This article will demonstrate how you can set up Custom Retargeting Audiences. You may want to set up Custom Retargeting Audiences when you are working with a merchant’s website that has distinct parts to their website. In this tutorial, using an automobile website as an example, we will walk you through how you can create distinct campaigns for those people who looked at a “parts” page of the website and those people who looked at the “service” page of a website. These are two different types of interests and is the reason why you can create a unique audience for each.
Part 1: Setting Up A Custom Retargeting Audience For Premium Autozone Parts Section
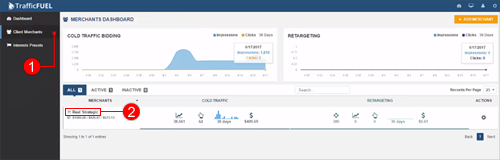
1.) From your Main Dashboard, click Client Merchants (1), and select the Client Merchant that you want to set up (2).
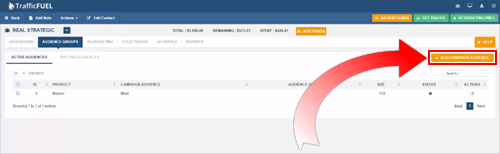
2. Click the Audience Groups tab.
Note: ⚠ Always have the Retargeting Pixel set up first on the webpages of the website that you are doing this for before you proceed to the next step.

3.) Click Add Campaign Audience.
🛈 The “Master” is the default retargeting audience and it Retargets all the sections of their website. What we can do is to define a custom audience for those that visited the parts section of the website and a custom audience for those that visited the car service section of the website.
4.) Select the Product Category. In this example, we will be adding a new Product Category since we are setting up automobile parts.
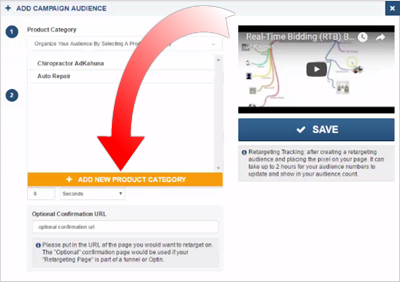
5.) Type the Product and Campaign Name.
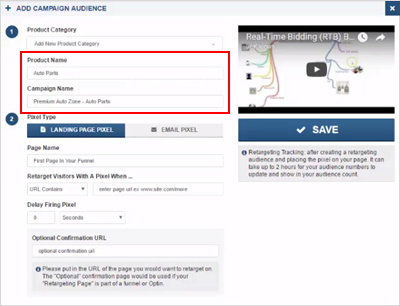
6. Select the Pixel Type that you are Retargeting and then type the Page Name of your campaign. In this example, we will be using the first part of the website section that we are setting up this custom audience for. This tells us that everything in the parts section of the website is what this is for.
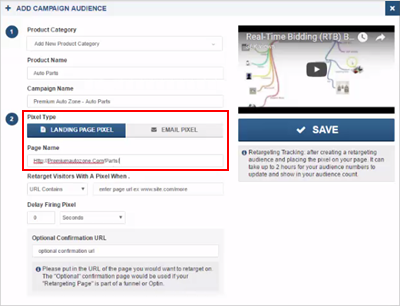
7. Set Retarget Visitors drop-down to “URL Contains” and then Paste the website URL.
🛈 In this example, we will be using the http://premiumautozone.com/parts/. By pasting this URL, anyone that comes to this URL and no matter what else might be beyond that URL, as long as it includes this, it is going to include them in the audience. It is going to start capturing who it is that is coming to this section of the website.

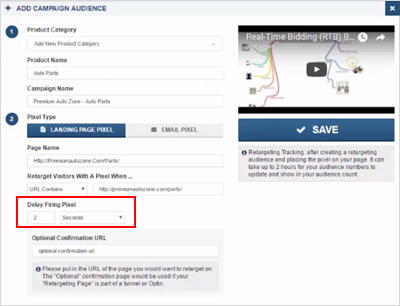
8. Set your Delay Firing Pixel. In this example, we have set the Delay Firing Pixel to “2” seconds. What this means is if someone does not stayed on the page for 2 seconds or more then they will not be included in that audience. Once you are ready, hit Save.
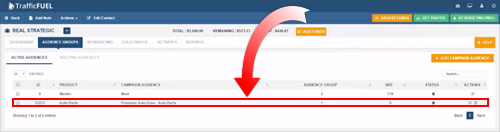
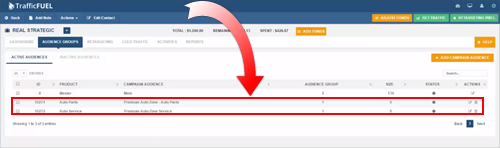
9.) You will now see that you have successfully added the Campaign Audience for the Auto Parts.
Part 2: Setting Up A Custom Retargeting Audience For Premium Autozone Service Section
1.) To create another Campaign Audience, click Add Campaign Audience.
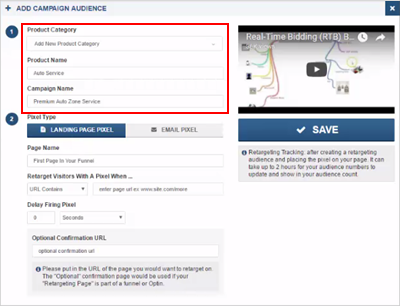
3.) Select the Pixel Type that you are Retargeting and then type the Page Name of your campaign.

4.) Set your Retarget to “URL Contains” and then Paste the website URL. This time, we will be using the http://premiumautozone.com/service/ URL.

5.) Set your Delay Firing Pixel and then hit Save.

6.) Now, you will have two custom audiences set up and if you want to create your Retargeting Campaign, you can select which audience you want.
Part 3: Creating A Retargeting Campaign
1.) Go back to your Main Dashboard and go to the Client Merchants tab (1) and then click the Client Merchant (2) you want to set up.
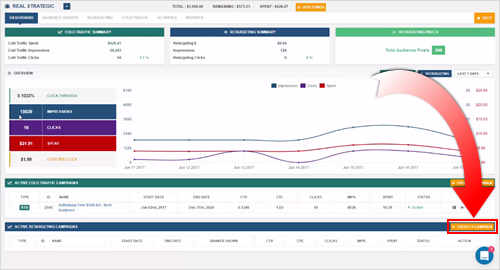
🛈 To quickly go back to the Main Dashboard, click the Traffic Fuel logo found on the upper left corner of your page.
2.) Under the Active Retargeting Campaigns section, click Create A Campaign.
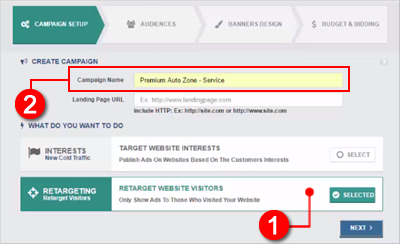
3.) Select Retargeting to retarget visitors (1) and then type your Campaign Name (2).
4.) Paste your Landing Page URL and then hit Next.
🛈 In this example, we will be putting a Landing Page where we are directing people that had been previously interested in our Automobile Service. We are using our special pricing landing page - offering a special price for these people when they come to this Landing Page.
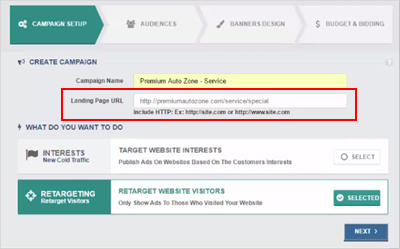
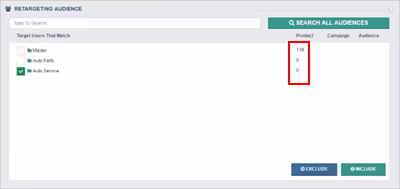
5.) This next step is where you are able to select your audience. Because we want to target people that were interested in Service, tick Auto Service checkbox (1) and then hit Include (2).
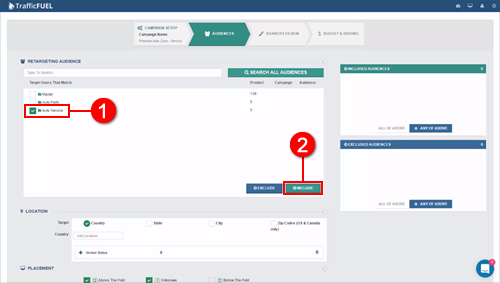
🛈 These numbers represent the number of visitors that had been to the corresponding section of the site.
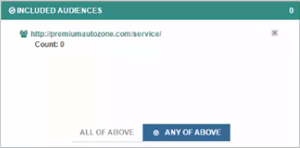
6.) You will see that you have included people that had been to the Service section of your website.
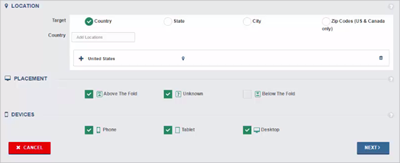
7.) Set up your Location, Placement and the Devices for this particular campaign. Once you are all set, hit Next.
8.) Select how many sets of ads you want for this campaign and then hit Save.

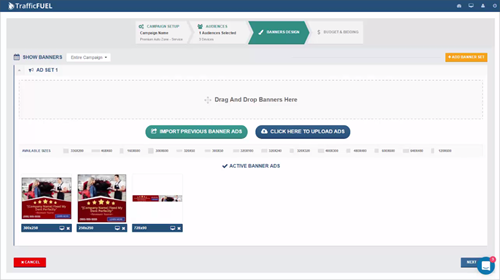
9.) Drag and drop your banner ads and then hit Next.
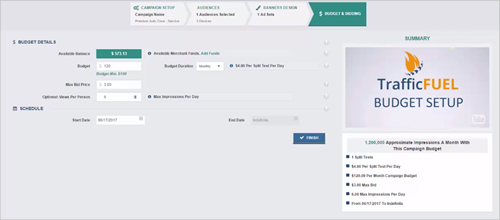
10.) Set up your Budget and once you are done, hit Finish.
11.) You have just set up your Custom Audiences and set up a Retargeting Campaign specifying to that custom audience for automobile service.