To integrate Google Calendar in Prospect Rocket, follow these steps:
-
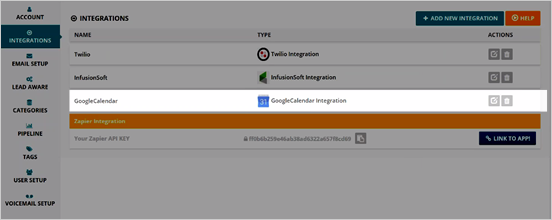
From the Main Dashboard, click ‘Settings’ > ‘Integrations’.

-
Click ‘Add New Integration’.

-
Select ‘GoogleCalendar’ as your Integration Type and then click ‘Connect To Google Calendar’.

- This will open up your Google account and will let you choose what account you want to connect.

-
Click ‘Allow’ to allow Prospect Rocket to manage your calendars.

- Now select the calendars that you want to show up inside of Prospect Rocket.

-
Choose where you want your appointment and activities in Prospect Rocket to be created. Once you are done, click ‘Create Integration’.
- Prospect Rocket is seeing the things that are on your Google Calendar and the things that you create in Prospect Rocket are being added to your Google Calendar.

- You will now see your newly added Google Calendar integration in the Integrations list.
-
Click the Edit icon (
 ) if you want to modify your Google Calendar integration. If you want to remove it, click the Delete icon (
 ).
).