
1.Go to ‘Marketing’ > ‘Broadcast’ and click the ‘Create New’ drop-down. To create a new email broadcast, choose ‘Email Broadcast’


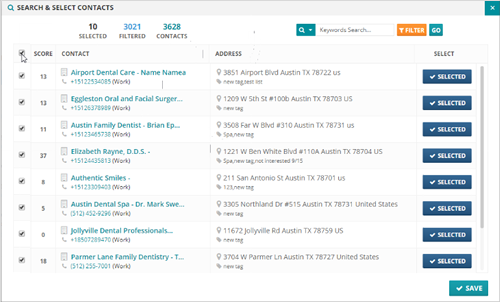
🛈 From here, you can select the contact that you want by clicking the checkbox on each contact. If you want to select them all, click the select all checkbox which is the top most checkbox. Once you are done, click ‘Save’. You will now see the number of contacts in your search.
You can do multiple searches and add a list at the same time and it will add the number of leads together to get your total amount of contacts to be included inside of the broadcast.

7. Next set up the information for the actual broadcast. On the Profile field, select which email profile will be sent out. You can select your Cold Marketing Emails or your Warm Optin Emails.


🛈 Use the ‘Spam Check’ tool to check the words in your content that might be spam.


🛈 You can also add tokens to create and personalize your message.
Note:
Keep in mind that the time here is the time in your settings section and not the actual time zone of the contact so make sure that you account for time zones if you are sending to people in different time zones.


 ). You can choose which Subject and Body that you want to use for your test email as well as selecting the Example Contact to fill in the token information. Once done, select whom you want to send the test email to be clicking the corresponding checkbox. You may also use a specific email if you want to.


 ). You can choose an example contact to fill in the token information

 ) if you have a custom subject line and email copy that you would like to create a template of. When you are saving your template, just go ahead and type the name of your template and choose whether you want that template to show up for yourself or for your entire team and click ‘Save’.
Note:
When creating a template, we will only save the first subject line and the first email content.

After you have created your template, it will show up in the template drop-down. You can also see it when you go to ‘Messaging’ > ‘Templates’. Keep in mind that single email templates are different from email sequence templates so you will not see the same template in each area.