We recently updated Reputation Kahuna. We added a brand-new feature that allows you to create custom fields in your Sign In campaigns!
Click here to learn how to create a Sign In campaign.
Complete the following steps to create additional custom fields in your Sign In campaigns:
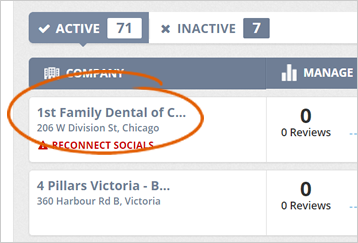
Step 1. Select a business from the Agency Dashboard.
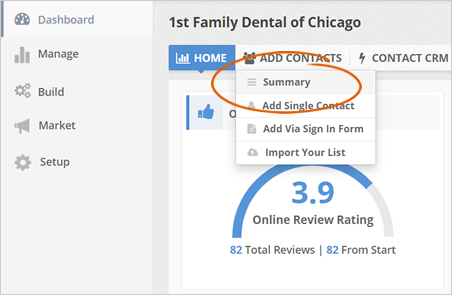
Step 2. Hover your mouse over the Add Contacts tab and select Summary.
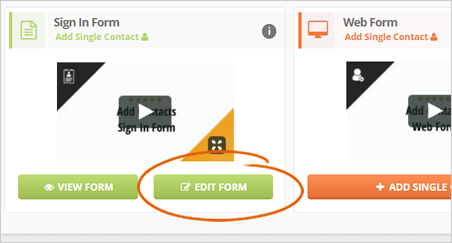
Step 3. On the Sign In Form tile, click the Edit Form button.
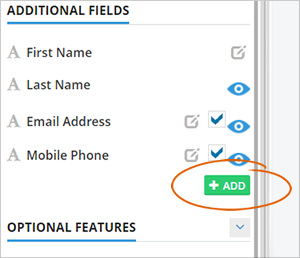
Step 4. Under the Additional Fields section, click Add.
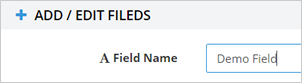
Step 5. Type the field’s name.
Step 6. Select the field’s type. You have three choices:

Step 7. Complete the field’s placeholder.
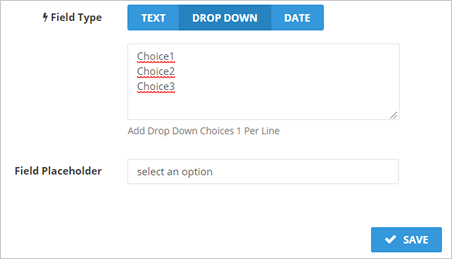
If you selected the drop-down choice, add options that your customers can choose. If you selected the date choice, pick a sample date.
Step 8. Click Save.
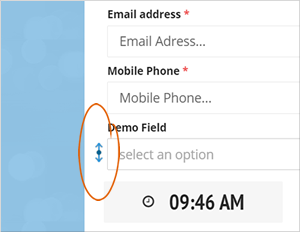
Step 9. Drag and drop fields to reorder the fields as needed.
Related Articles:
How to Remove the Google Instruction Wizard From the Sign In Form
How Do I Edit My Reputation Kahuna Thank You Page for Surveys
Can I Edit the Number of Emails in the Sequence for a Running Rep Kahuna Campaign
How to Set Up a White Label Subdomain in Rep Kahuna
How to Remove the Logo From the Social Images Posted to Social Media
How to Set up Social Networks