The One Time Report provides the same information as your Scheduled Report does. The only difference is, they only run one time and nothing scheduled.
To run a One Time Report, follow these steps:
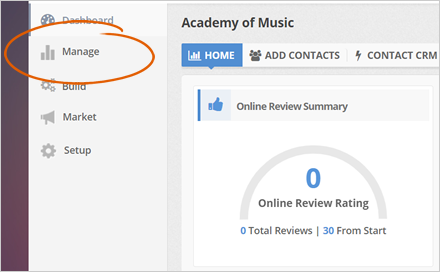
Step 1. From the company's dashboard, click Manage.
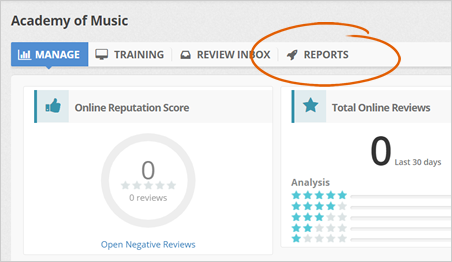
Step 2. Click the Reports tab.
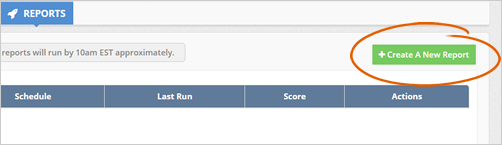
Step 3. Click the Create A New Report button.
If you are working with a mega-company that has a lot of reviews all over the internet, we are going to pull in everything that we can initially to get the merchant started and get the reviews posted. It could take up to 10 days to capture all the reviews online.
Step 4. Select One Time Report as the report type.
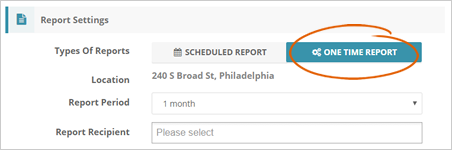
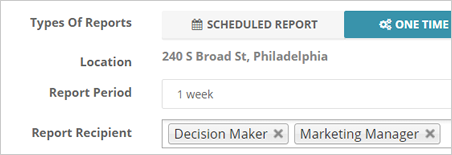
Step 5. Set up how often you want to run the report in the Report Period drop-down. After setting this up, add the persons where the reports will be sent.
You can add multiple report recipients if necessary or add your email address here if you want to receive the report.
Step 6. Select what features of reports you want to show to the Report Recipient.
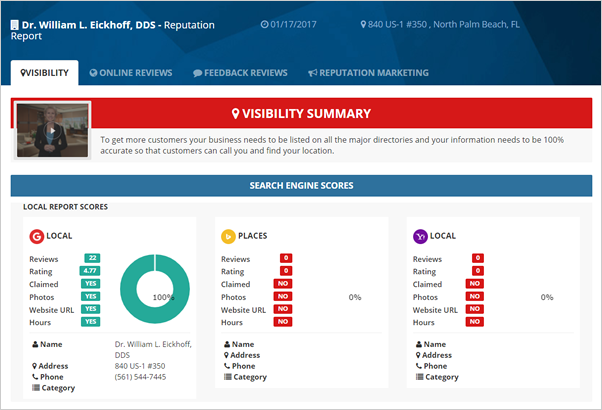
The Locations control all listings shown in the Visibility tab. You can set this up in the Monitoring section. If you want to learn more about how to set up a company's monitoring, read this article.

Step 7. Click the Create Reports button to generate your One Time Report.

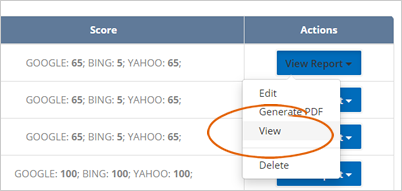
Step 8. When your report is successfully generated, go back to the Report Dashboard and click the View Report drop-down on the report that you want to see, and select View.
Related Articles:
How To Set up a Scheduled Report
How Do I Access My Reputation Report
How Do I Change the Phone Number on the Reputation Report Display Page
New Reputation Reports Overview