This article will walk you through the process of customizing the Company header. You will be accessing your branding section and changing all the default controls to get the complete branding for your business. You will see your actual header design on this page, and this header will be the default header for all of your Feedback Pages.
Follow the steps below to start customizing a company's header:
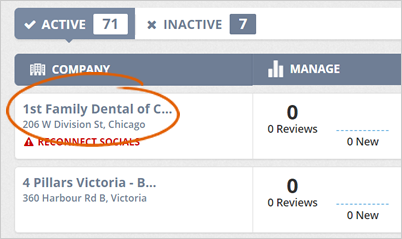
Step 1. Select a business from the Agency Dashboard.
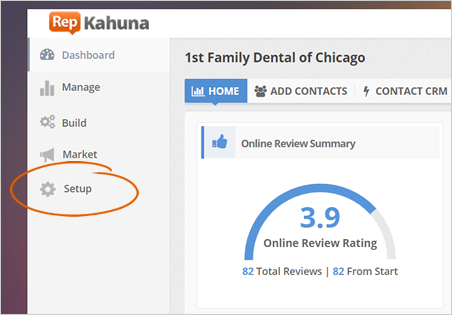
Step 2. Click Setup.
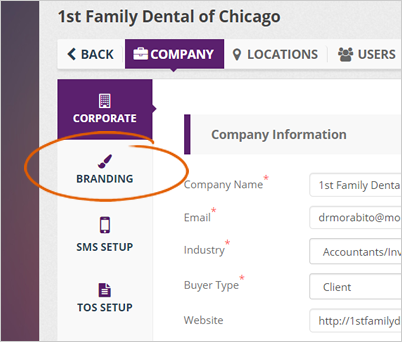
Step 3. Click Branding.
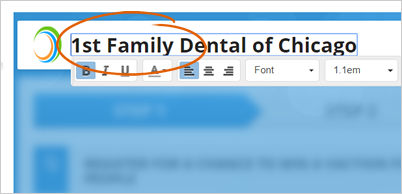
Step 4. If you want to edit the merchant's name, you can type the merchant's name in the Company Name text inside the preview windows on your right. This step is done if the merchant has changed their business's name.
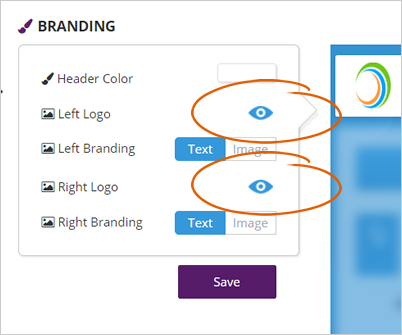
The best size for your logo is at least 125 x 125 pixels. You cannot resize your logo, but you can adjust how it is displayed in your banner.
You can only change the business's text if the left or right branding you selected is text. Otherwise, you only change the business's logo.
Step 5. If you don't want to use a logo (left or right) on your header, click the eyeball icon to hide it.
Step 6. To change your Header Color, click the Header Color element and select a color from the color picker.

Step 7. Click Save to apply all the changes you have created.
Related Articles:
How to Delete a Location
How Do I Edit My Reputation Kahuna Thank You Page for Surveys
Can I Edit the Number of Emails in the Sequence for a Running Rep Kahuna Campaign
How to Create Additional Fields in Sign In Form
Spam Words to Avoid in Your Emails Sent From Reputation Kahuna
How to Set up Social Networks