 ) to drag it into your desired location.
Please note that when a block does not have a ‘move’ icon, this is already set permanently into that location.
 ).
).The Landing Pages Editor has two components:
) to drag it into your desired location.). 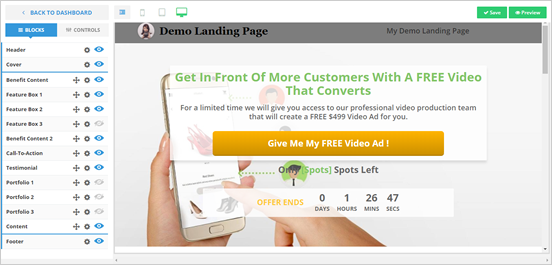
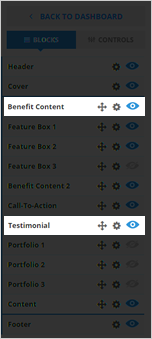
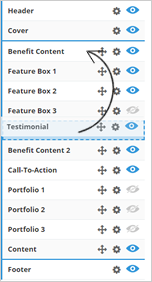
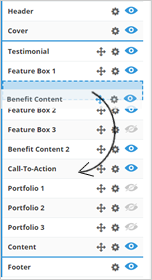
Use the Landing Pages Blocks to arrange the section on your Landing Page. Here’s a tutorial on how you do that:
Note:
You can move all the blocks on your landing page except the Header, Cover, and Footer.
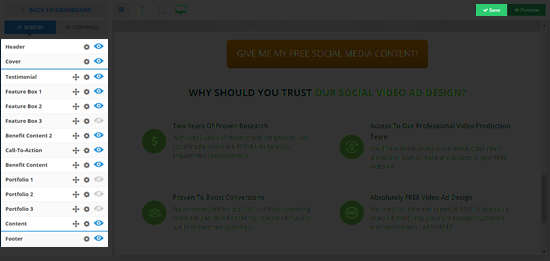
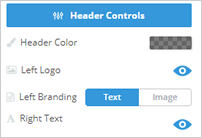
The first section that we will go through is the Header of your Landing Page.
🛈 To access your Landing Page Header Controls, click the ‘gear’ icon ( ) and make sure that the control is enabled (an enabled control has a blue colored eye icon
  ).
).
 |  |
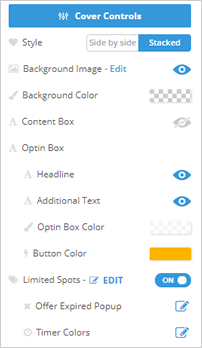
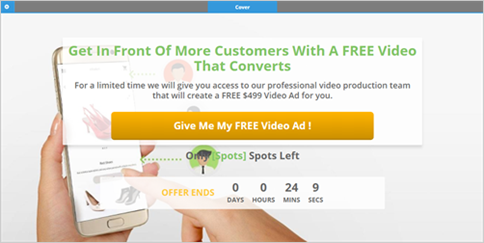
This next part is your Landing Page’s Cover. You have the ability to fully customize this area to be able to custom brand it in accordance to your needs.
🛈 To access your Landing Page Cover Controls, click the Gear icon ( ) and make sure that the control is enabled (an enabled control has a blue colored eye icon
  ).
).
 |  |
This next section displays what your viewers can get from your product. Make it short and direct to the point so you can encourage clients to opt-in and convert them into leads.
🛈 To access your Benefit Content Controls, click the Gear icon ( ) and make sure that the control is enabled (an enabled control has a blue colored eye icon
  ).
).
 |  |
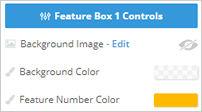
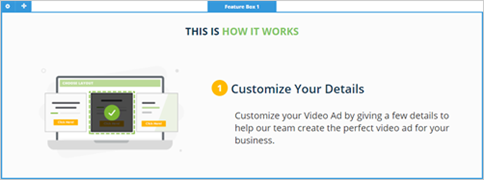
Your Feature Box gives you the ability to explain the features of the product you are offering to your customers. You edit up to 3 Feature Box and at the same time hide each box if you do not need it.
🛈 To access your Feature Box Controls, click the Gear icon ( ) and make sure that the control is enabled (an enabled control has a blue colored eye icon
  ).
).
 |  |
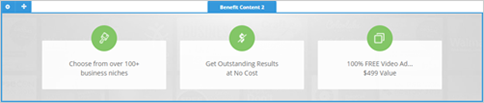
This section serves as an additional benefit that you want to add to your Landing Page. This is an important section because it refreshes the viewer on what they can get from your product or use this to showcase more benefits that they could get using your product.
🛈 To access your Benefit Content 2 Controls, click the Gear icon ( ) and make sure that the control is enabled (an enabled control has a blue colored eye icon
  ).
).
 |  |
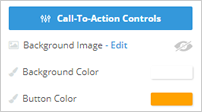
The Call To Action plays a very important role on your Landing Page. Viewers who clicked this will be redirected to a page that will let them leave their basic company information.
🛈 To access your Call-To-Action Controls, click the Gear icon ( ) and make sure that the control is enabled (an enabled control has a blue colored eye icon
  ).
).
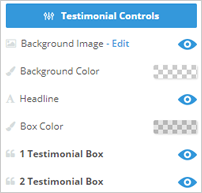
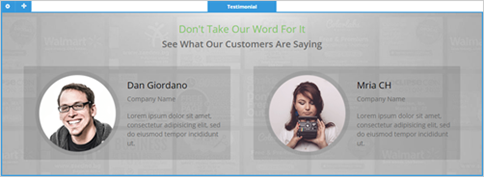
Let your viewers know how this awesome product helped your customers on their business using Testimonials. You can add two testimonials on your Landing Page and have the ability to customize each.
🛈 To access your Landing Page Testimonials Controls, click the Gear icon ( ) and make sure that the control is enabled (an enabled control has a blue colored eye icon
  ).
).
 |  |
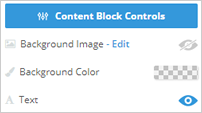
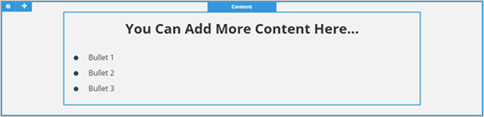
Add content to your Landing Page that enables your viewers to get more information about your product. In here you can add more lines describing your product.
🛈 To access your Landing Page Content Controls, click the Gear icon ( ) and make sure that the control is enabled (an enabled control has a blue colored eye icon
  ).
).
 |  |