Agenda Rocket is an Appointment Self Booking Service!
To create a campaign, follow these steps:
- Go to the Calendar section and click ‘Create New’.
- You can create several campaigns in Agenda Rocket. Each campaign is a segment of your calendar that you are going to make yourself available. You would want to create several campaigns because you want to make a campaign for a specific appointment type.

- Type your campaign name. Note: Remember that your campaign name will be shown to your leads.
- You can edit your Campaign Name later on if you want to.

Please follow steps 1-10, there is a ? icon at the end of each row for more information on each field
Then click Next Step to move over to the availability setup
- Here you will set your availability, there is an embedded video to walk you through the availability setup

- Next, you can configure the form that shows to leads when booking the appointment, please click the help video on this page for more assistance
- The Message tab lets you set confirmation and email/sms reminders. You can turn this ON/OFF if you need to. Click ‘Next Step’ to proceed.
- You may also edit your Confirmation/Reminder emails in here if you want.
- Click the ‘Add Reminder’ tab if you want a follow-up reminder on your previous one.

6. Set up your Prospect Rocket Automation. Click ‘Next Step’ to proceed to the next section.
- If you want to be notified of a booking, you need to create an automation for this in the same way you would do for a sequence Alert
- You can also share a contact to someone and let that person in your contact to close the sale.

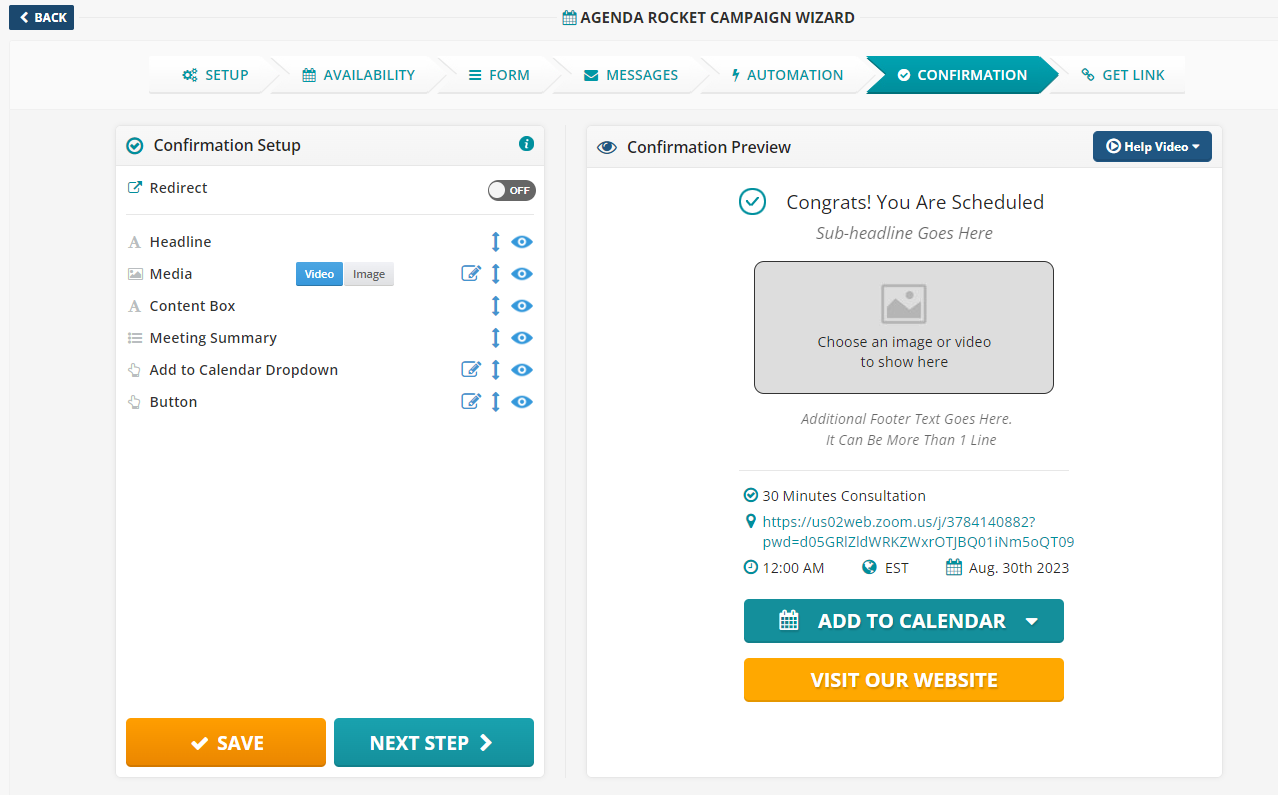
7. This next section lets you design your confirmation page. Again, there is a help video in the top right. Click ‘Next Step’ to finalize your campaign.
 8. Review your Campaign Summary and click ‘Save’.
- You can use the Button Code generated and link it to your website.
