The Campaign Automation gives you the ability to easily integrate your Prospect Rocket to your Landing Page. This will automatically export your leads into your Prospect Rocket Campaigns. This article will demonstrate, step-by-step, how to:
- Set up an Automation
- Add tags and activities to your Automation

How to Integrate Prospect Rocket to Your Landing Page
Complete the following steps to integrate Prospect Rocket to your Landing Page:
- From the Dashboard, click Ad Landing Pages.

- Select a Landing Page and click the Edit Page button (
 ).
).

- Click the Automation tab.

- Click Add Automation.

- Type the name of your Automation and click the Integration button.

- Select Prospect Rocket as your Integration and choose a Campaign from your Prospect Rocket account. Select a Delay to schedule your campaign. Select a Delay of “0” if you need your automation to be fired immediately. Click Save when you are done.

⚠ You can only Add or Remove 1 Integration per Automation Trigger if you are enrolled in our Free Plan. Upgrade your plan to Unlimited for unlimited integration. For more information, please contact our support team through this link:
http://www.lmgsupport.com. - See your new Automation. You have the option to add Tags and Activities to your Automation.

How to Add Tags to Your Automation
Complete the following steps to add tags to your Automation:
- Click the Tags button to add a tag. This will apply a tag once the Automation is fired.

- Add the tag that you need to apply to the automation. Set your delay to “0” to apply the tag immediately once the Automation is fired. Click Save.

- Verify that the tag is added into your automation. To remove a tag, select the tag that you need to remove and click the remove icon (
 ).
).
💡 To add another tag, repeat steps 1-3.

Adding Activities to Your Automation
Complete the following steps to add activities to your Automation:
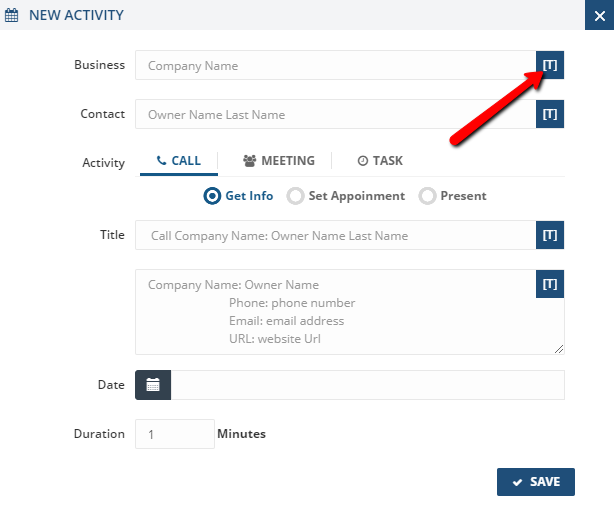
- Click the Activity button.

- See the tokens populating on the right side. You can make adjustments to any of the fields. You need to create the title and setup the date.

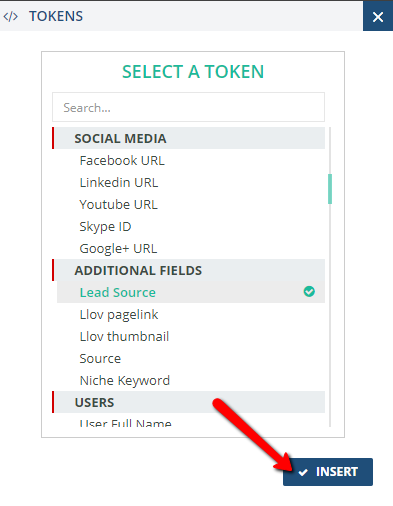
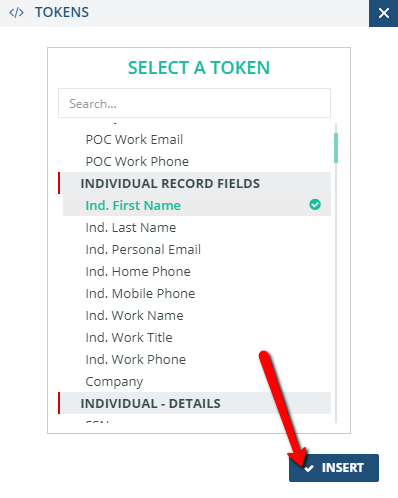
- Click the Token icon (
 ) and select a token. Ensure that the token has a check mark (
 ) before clicking Insert.
💡 To quickly find a token, type the name of the token in the token search box.
Update each field by adding tokens.
You have the option to create your activity into a: Call, Meeting, or Task.
- Call — create an activity to:
- Get information
- Set an appointment
- Send a present
- Meeting — setup a meeting by:
- Presenting
- Using a proposal
- Negotiating
- Task — setup a task to send an email or to do anything else.
Type a title, which can include multiple Tokens.

Set the Date and Duration for this activity. Click Save to apply your changes.

Verify that the activity is added into your Automation. Click Save to save all your changes.
💡 To remove an activity, select the activity that you need to remove and click the remove icon ( ).
).