The Video Option is your global settings, which will be used in your video anytime if it is going to be created. You have the option to override these settings per video if you need to do so. For example, if you would like to use a particular background for one of your videos, you can do that.
Below are the different video options on the Video Setup:
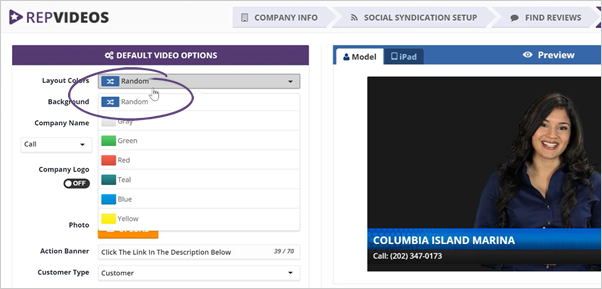
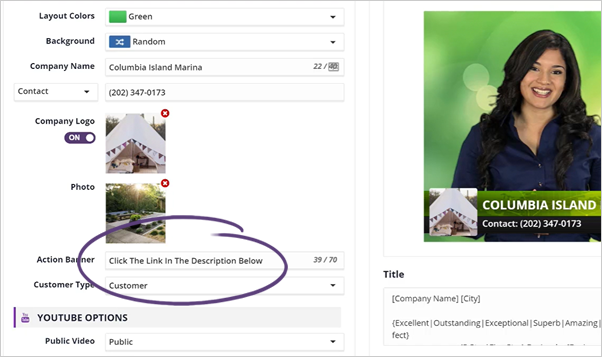
Step 1. If you want to change the default Layout Colors, click on this drop-down and select a color from the list.
Step 2. Decide the Background Color that you want to use. If you do not wish to use the default background color, click the Custom Background button.
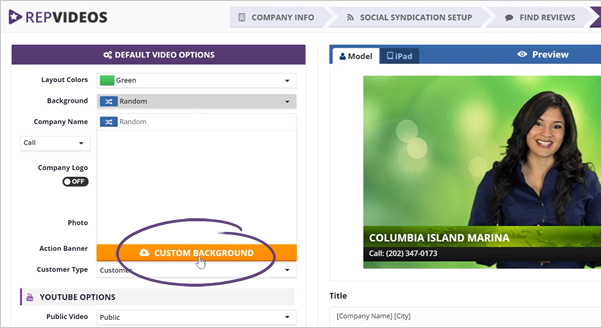
You can upload up to six custom backgrounds, and it will be displayed behind the spokesmodel.
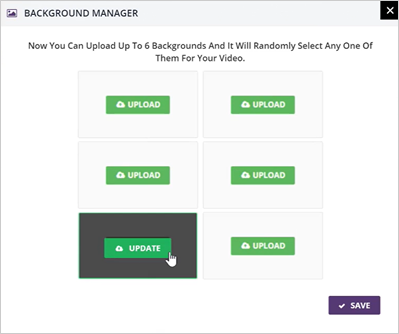
Step 3. Once you have uploaded your custom background, click Save.
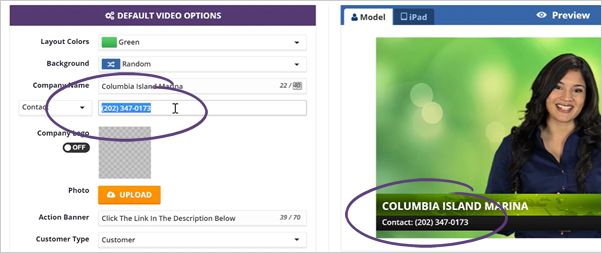
Step 4. Start changing the call to action found on the lower third of your video.
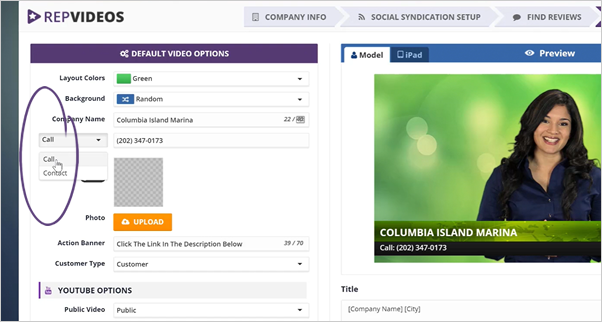
Step 5. Once you have selected the call to action text that you want to use, type in the contact number that you want to display.
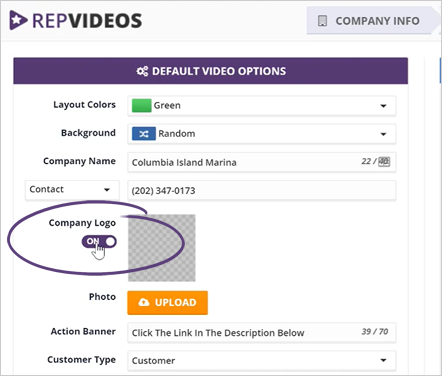
Step 6. You have the option to show or hide the company logo. Enabling this element lets you upload your logo found on your local computer.
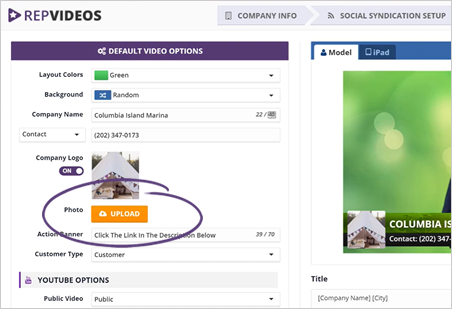
Step 7. Add a photo that will be shown next to the spokesmodel if you would like to.
If your business is working in ecommerce and you want to promote a particular product, this is the feature that you want to use.
Step 8. Once you have uploaded your image, crop the photo, and click Save.
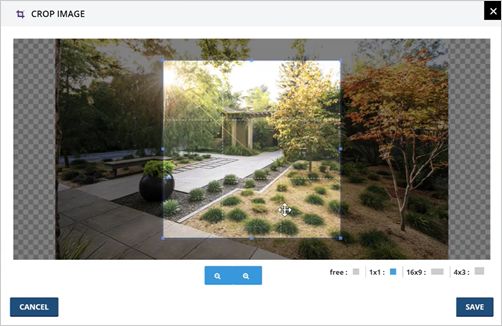
Step 9. Move and resize the image to its best appearance in your video.
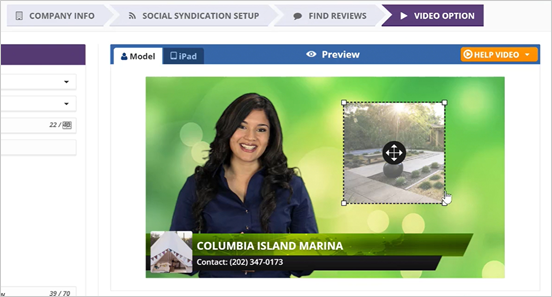
When moving an image, you can adjust the spokesmodel's location to either the left, middle, or right side of the video.
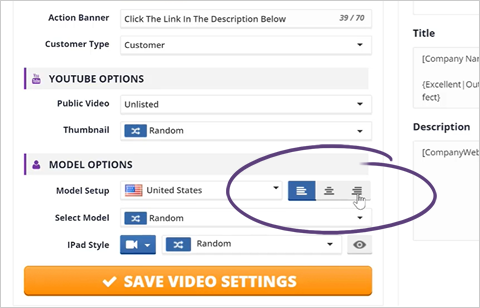
Step 10. Decide the action banner that you want.
This banner will attract the attention of the visitor who's watching your video to the description. You can always change this area to any disclaimer of your choice.
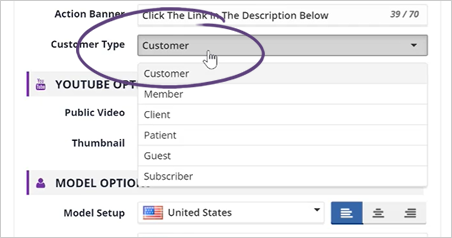
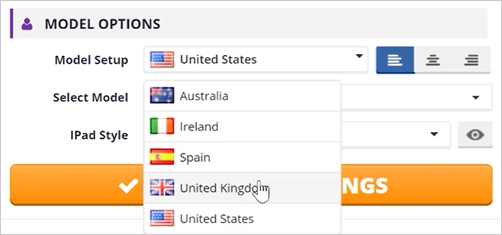
Step 11. Select the Customer Type for this business.
Selecting the right customer type will impact the language that the spokesmodel will be using in its introduction.
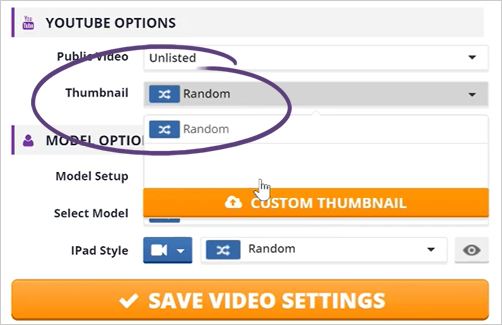
Step 12. Select if you want the video to be listed public or unlisted. Public videos will be visible on search engines and easily found online when a user is looking for specific information for the reviews of a particular business.
Unlisting a video is a great way to use it if you are giving away a free video and hosting it on your YouTube channel and not being promoted on your account. This video will only be visible to the users who have the link to the video.
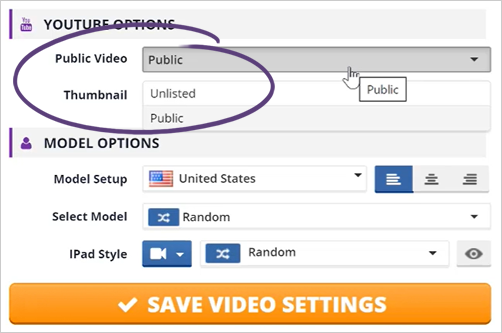
Step 13. Select the thumbnail that you want to use. You can either use the default thumbnail or use a custom thumbnail if you like.
Step 14. Select the model accent that you want to use.
You can always use different spokesmodel for your video if you need to.
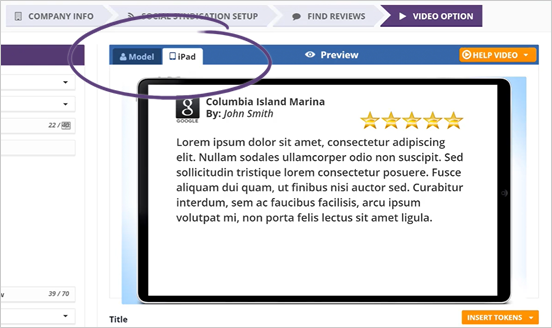
Step 15. Another feature of your video is the iPad style.
These styles can either be live or static version. Depending on your preferences, select the style that you want to use.

If you do not want to use this feature, click the eye icon.

Step 16. Using the iPad style feature will let you preview how it actually looks like on the preview window.
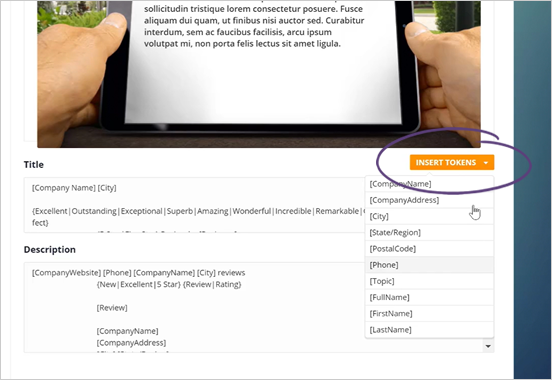
Step 17. Next, review the Title and Description of your video. It's always a good idea to add a custom SEO set up for your video for the best results on search engines.
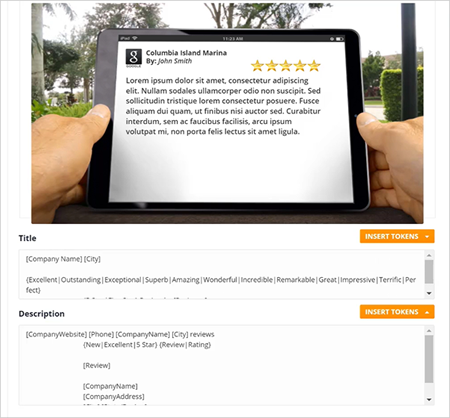
Step 18. You can also customize these sections by adding tokens and typing in your desired title and description.
Step 19. Once you are done, click Save Video Settings.

Related Articles:
Business Setup Step 1: Company Info
Business Setup Step 2: Social Syndication
Business Setup Step 3: Finding Reviews
Your Rep Videos Dashboard at a Glance
Business Summary Dashboard Overview