In this article, you will learn how to set up your notifications settings so you never miss a beat when a lead opts in for your Funnel Maps agency site or any of your landing pages.
Remember, the best time to follow up with a lead is within twenty minutes of them opting in when the information is still fresh on their mind. Funnel Maps makes that possible by sending you and your team instant email alerts.
To set up your Notification Settings, follow the steps below:
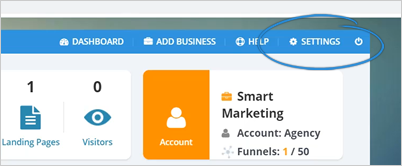
Step 1. From the main dashboard, click Settings.
Step 2. Click the Notifications tab.

Step 3. By default, Funnel Maps sends all your email notifications to the email address associated with your account.
To change that, click on the email address field and type in the email address that you want to use.
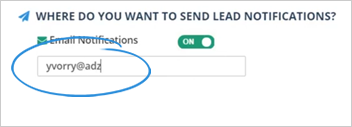
Step 4. Once done, click Save.
Step 5. If you want you and your employee to receive email notifications when a lead opts in or takes action, you can add more email accounts to get notified on your landing page settings.
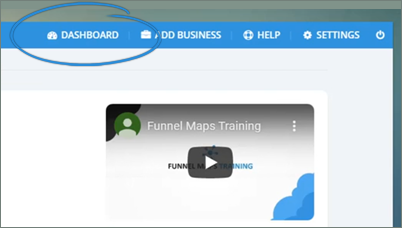
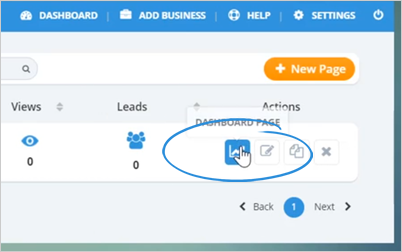
To set that up, go back to the main dashboard.
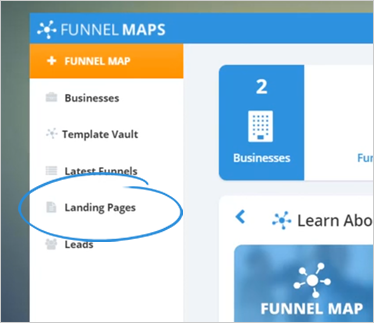
Step 6. Click on Landing Pages.
Step 7. Under the Actions tab, click on the Dashboard Page icon.
Step 8. On the page dashboard, click the Page Settings button.
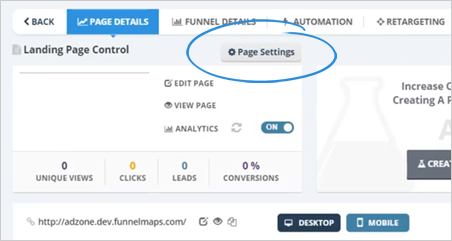
Step 9. Click the Notifications tab.

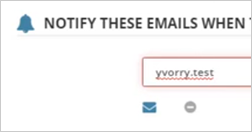
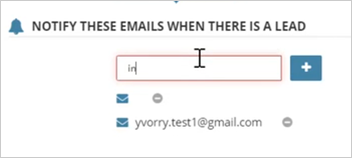
Step 10. Type in the additional addresses that you wish to get notified.
Step 11. Once you are done, click on the plus button.
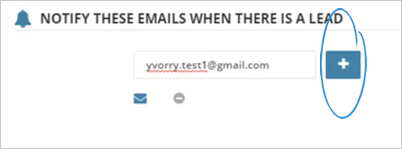
Step 12. Add more email addresses if needed.
Step 13. Once you are done, click Save.
Related Articles:
Agency Profile Settings
Agency Email Setup Settings
Agency Integration Settings
Agency Manage Tags Settings
Agency In App Ads
Updating a Business Profile