This section walk through how to set up a Retargeting Campaign.
💡 To learn how to create a new Retargeting Campaign, follow these steps:
- From the Dashboard click Client Merchants from the left nav > click on a client > from the Active Retargeting Campaigns section click the Create a Campaign button.

- The first page of the Retargeting Campaign Setup Wizard requires you to Name your campaign and add the Landing Page URL. Next you can choose between an Ad Traffic Campaign or a Retargeting Campaign, the Retargeting option has already been selected for you.

- The second page requires you to hone in on your retargeting audience, which you’ve already created. For help on creating your Audience Groups click here. TrafficFuel will allow you choose from all audiences that have been created for this client merchant. You can click into audience funnels that you’ve already created.
You can select include or exclude an audience as you wish. For example, if you would like to market the people who didn’t convert, you must exclude the conversion page. In this case, you’d include landing page but exclude the confirmation page.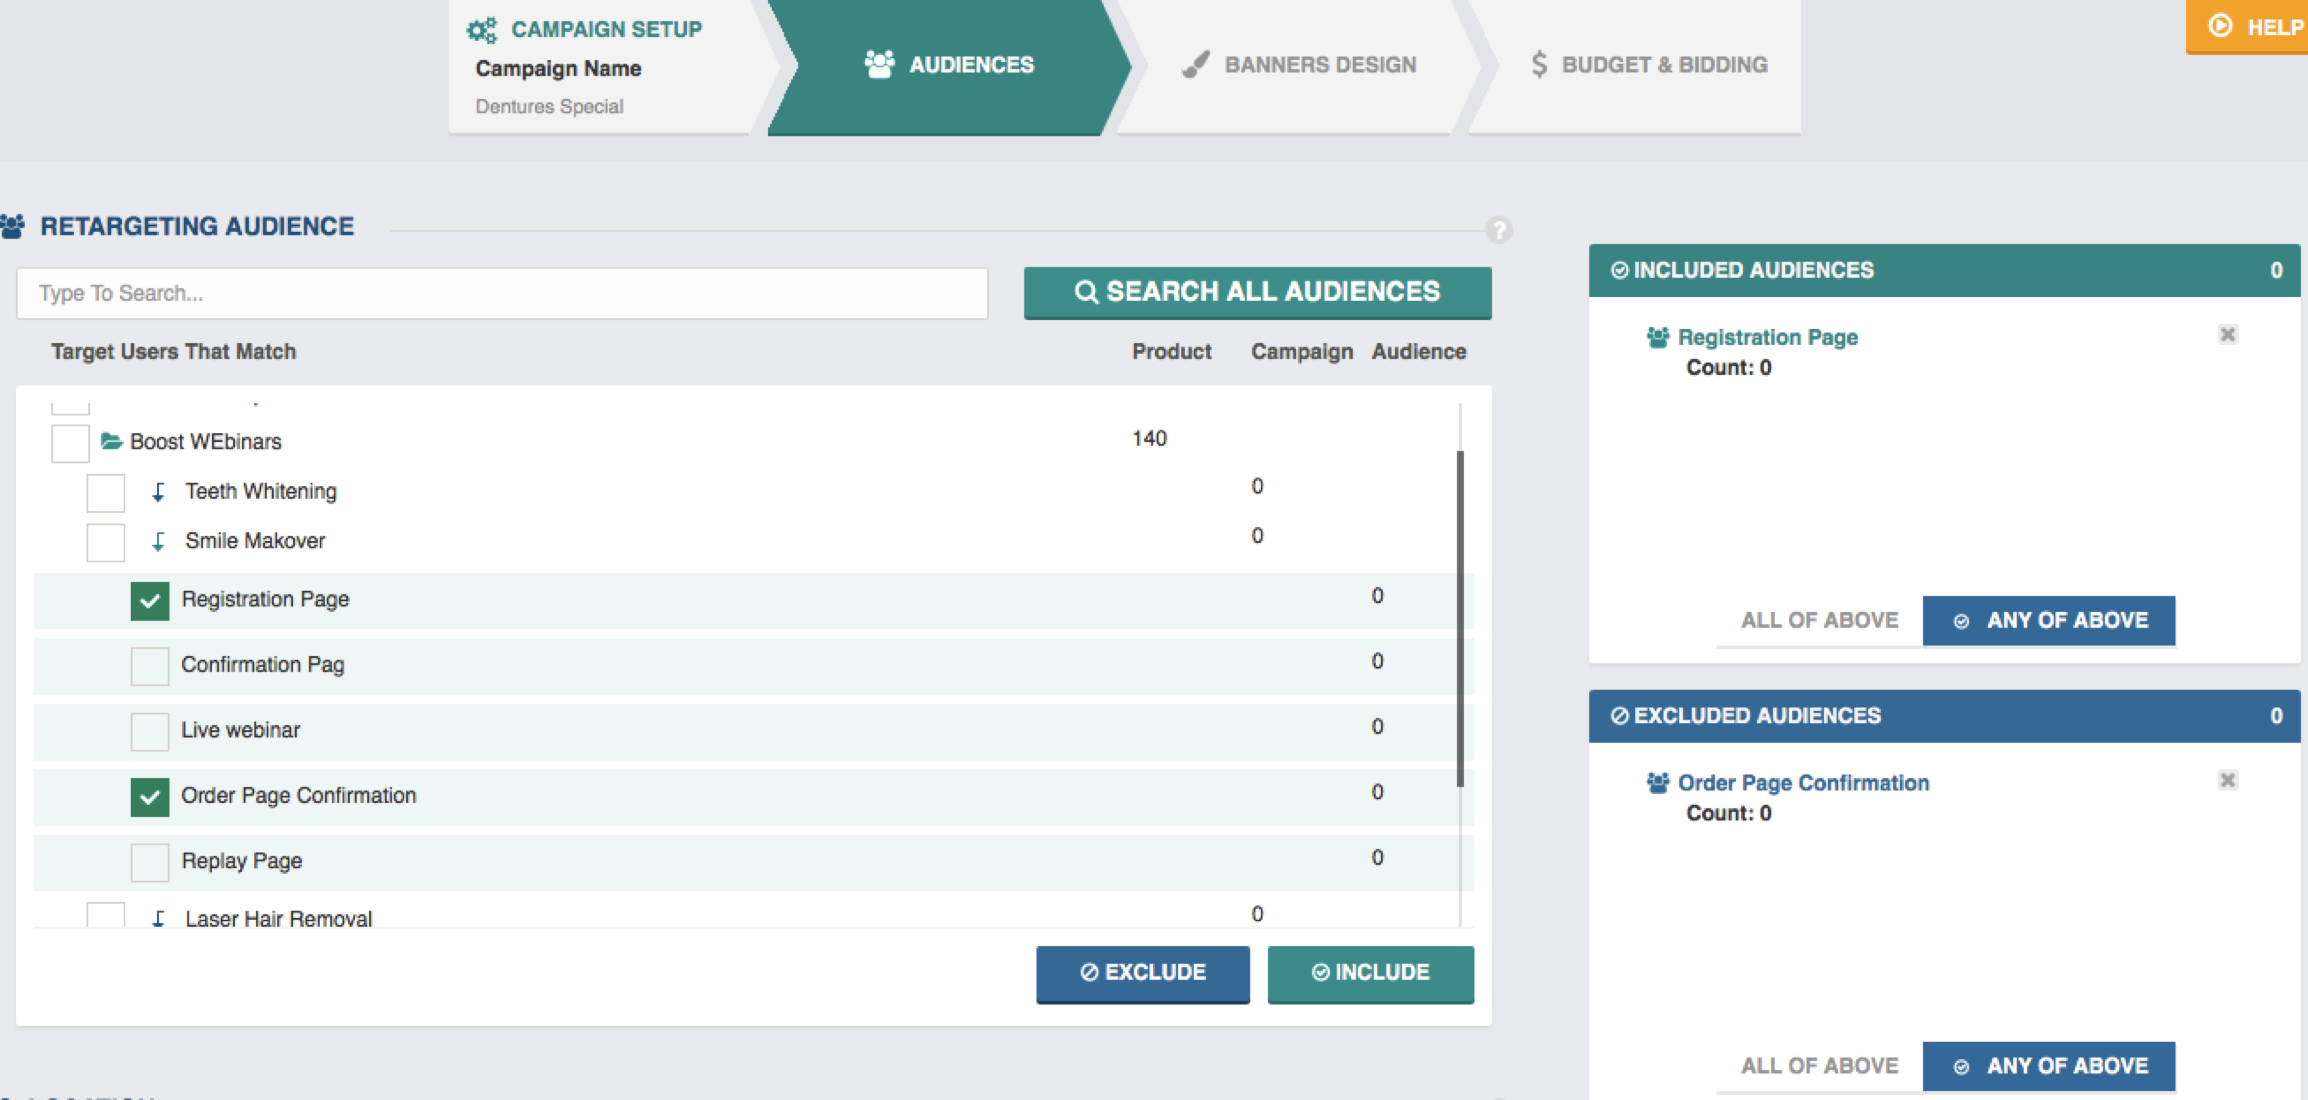
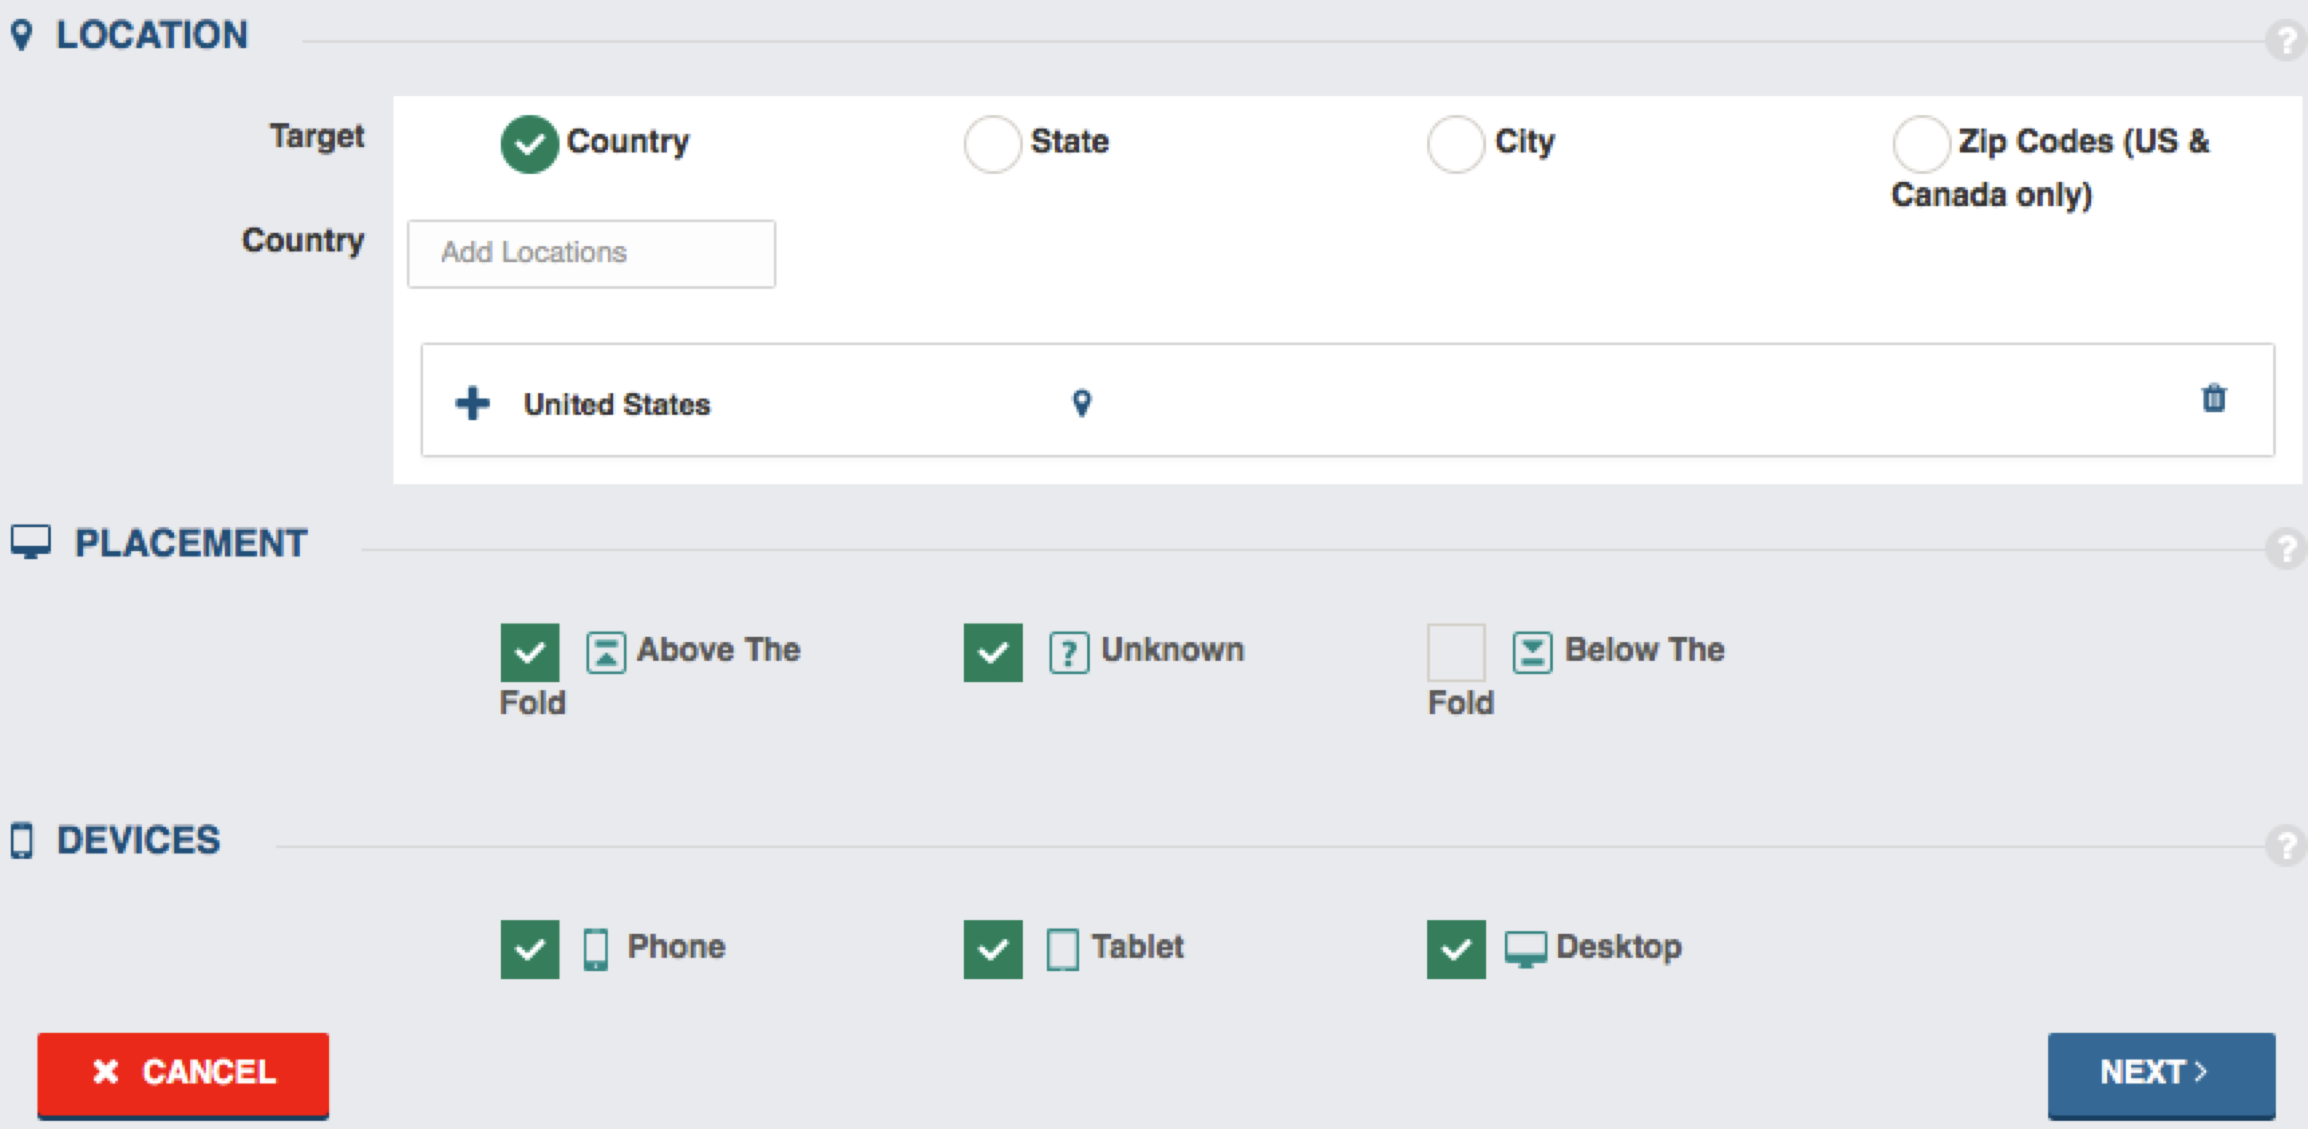
- The next step is to select a geo or location by either country and/or state and/or city and/or zipcode then select placement and device.
Banner Sets
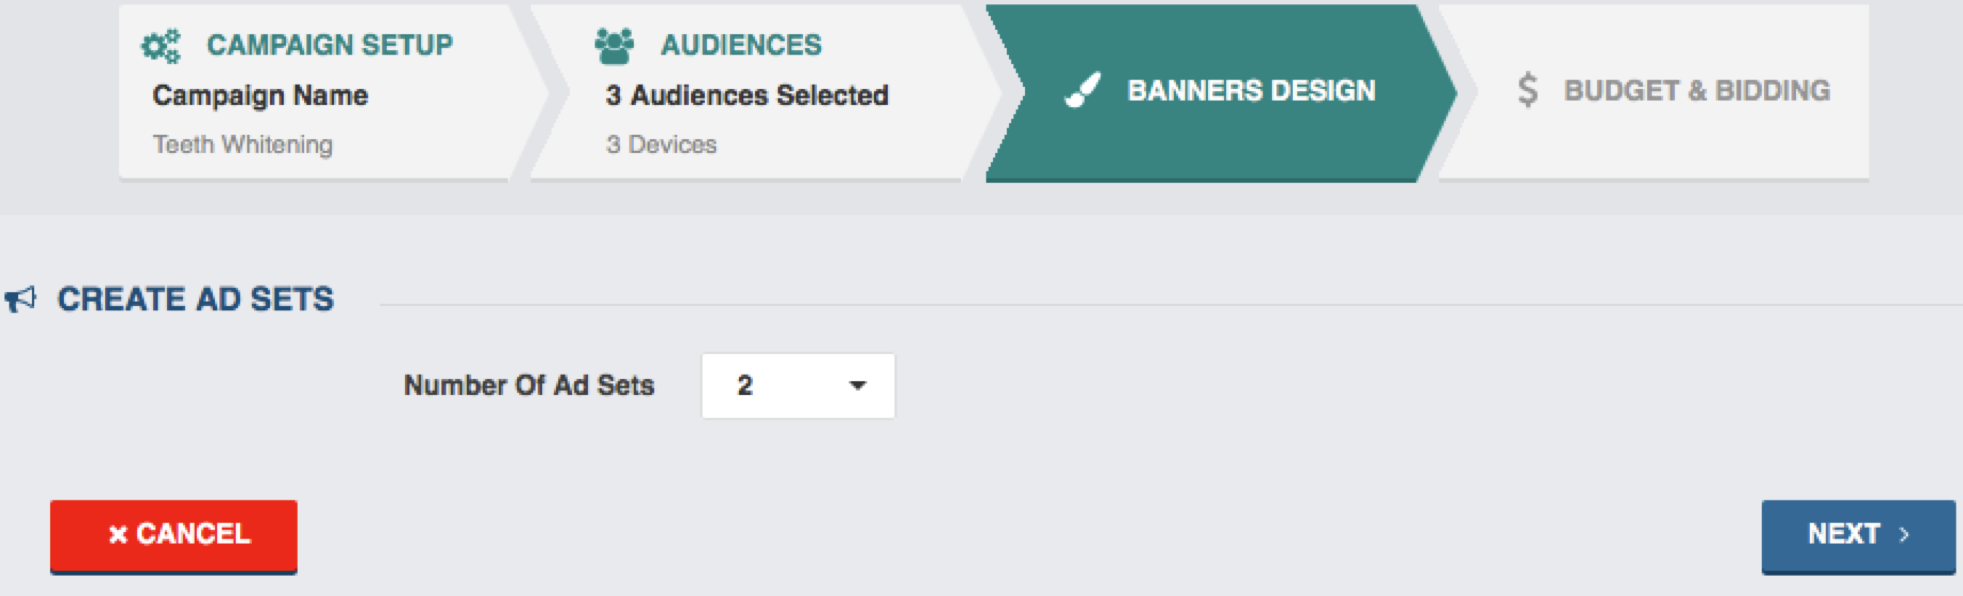
- The next section of creating your campaign is to create your Banner Sets. First select the number of ad sets you’d like to run and click Next.
- Next, you can drag & drop or click Upload to upload your banners. You can also add or remove ad sets.

How to Create Multiple Ad Sets running on different days:
TrafficFuel offers you the ability to specify how you want your ad set to run. You can select entire campaign or define a specific period. Selecting specific period is like a split test, where we rotate the ads for you over the duration that you specify. This allows you to test which ad set performs the best. All you have to do is specify start day and end day for each ad set and we’ll do the work for you.
Bidding & Budgeting
- The last step of the campaign creation process is Bidding & Budgeting. Firstly, you need to have funds available to use towards your campaign. If you don’t, then you can add them from this page by clicking Add Funds. Keep in mind that the Available Balance gets calculated, every time you visit this page, by subtracting this Client Merchant’s remaining balance from the sum of the daily limits on your other active campaigns for this client.
Next, you need to add a budget, or a daily limit, and select a budget duration. Note: there is a minimum of $10 daily limit per campaign. Then add your Max Bid Price, Views per person, Start Date and End Date. Note: the Start and End Dates will be fixed unless you select the Lifetime budget duration.
- Click Finish to submit your campaign. Your campaign will be Pending until it has been approved. You will receive an email and SMS when you’re campaign has been approved and begins. It typically takes about 48 hours, but we try our best to get them approved as soon as possible.
- You will be returned to this newly created Campaign’s Dashboard. Your campaign status will be Pending until it has been approved.
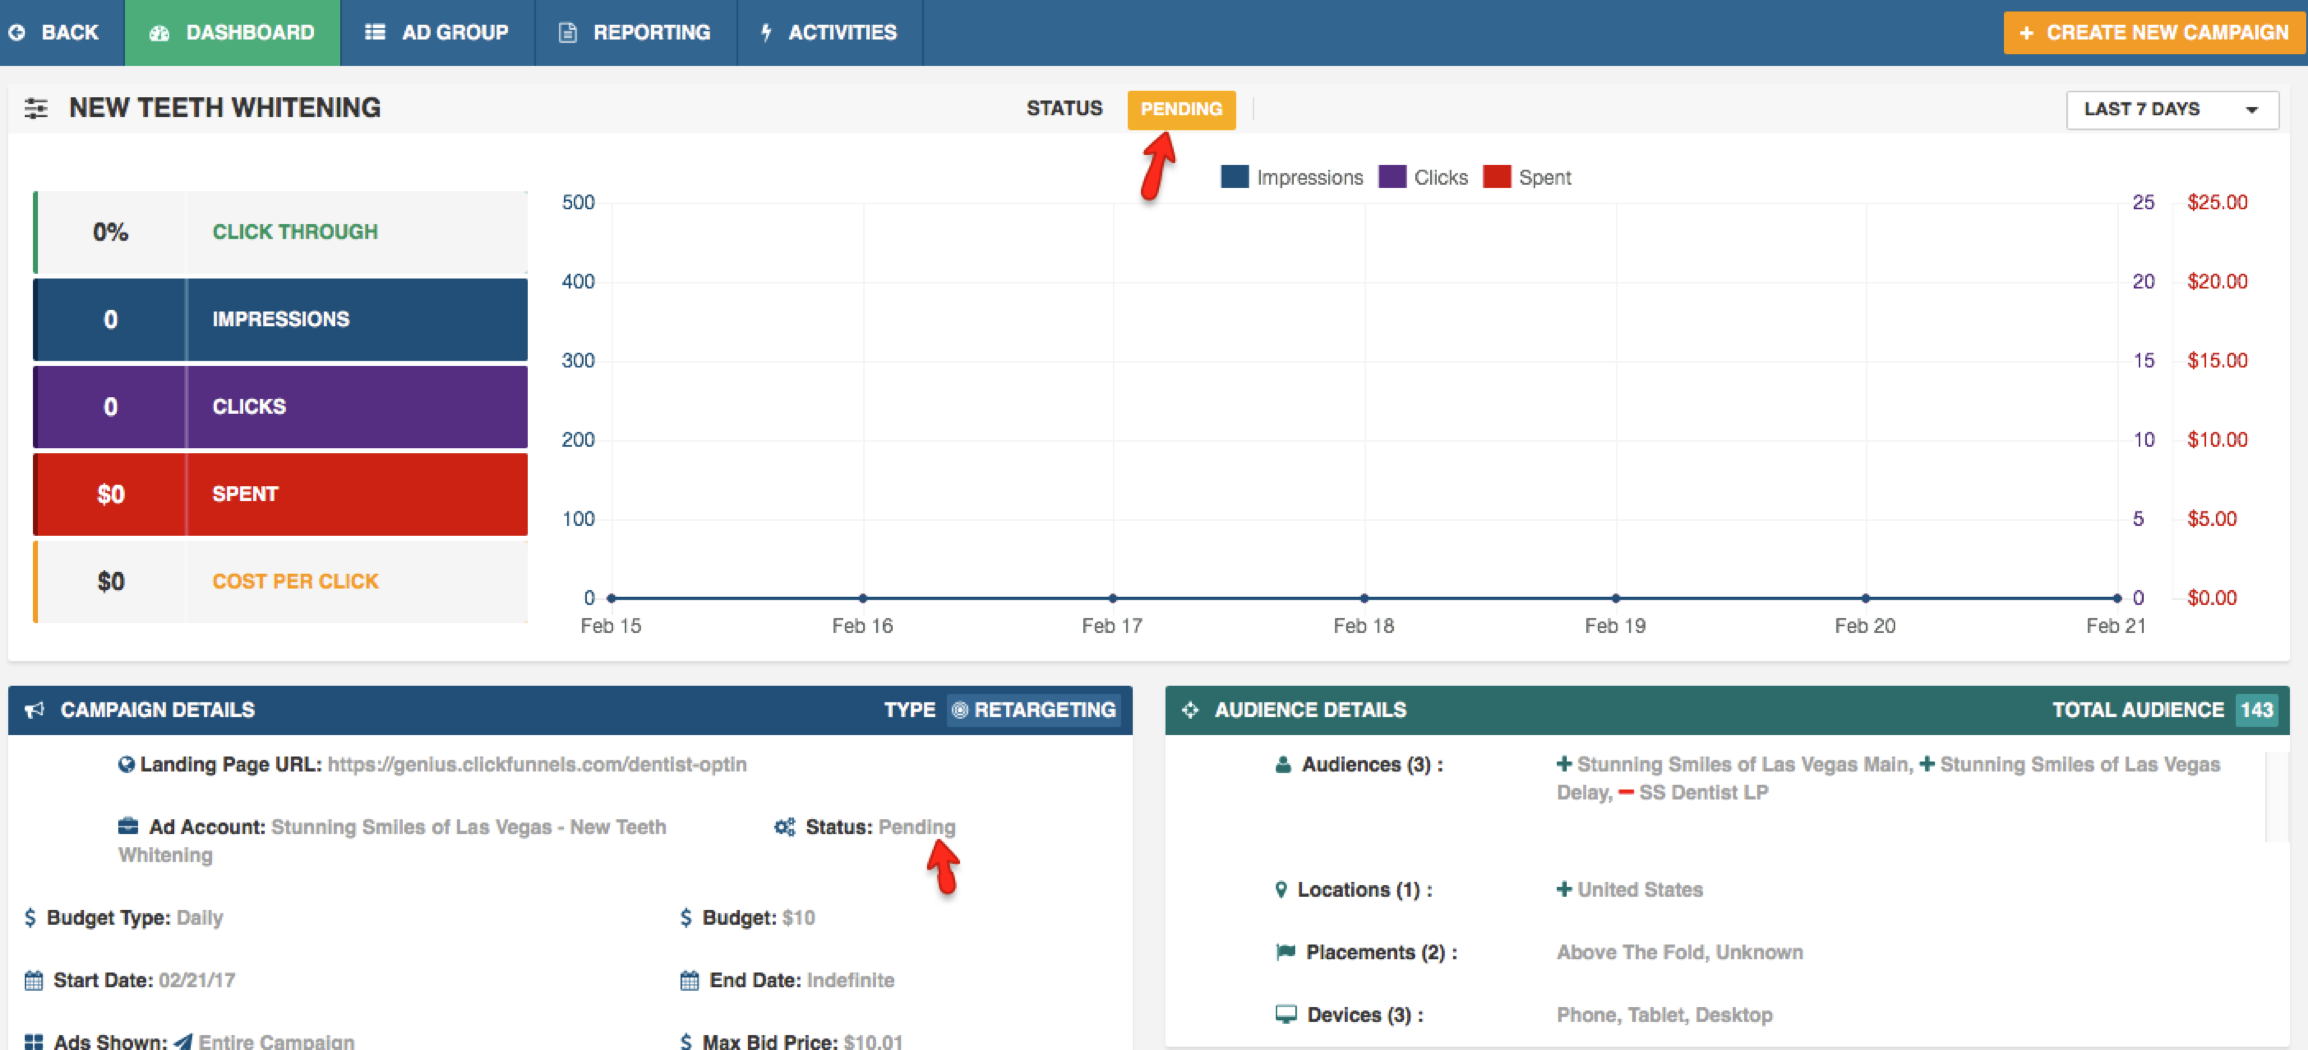
- You will receive an email and SMS when your campaign has been approved and starts running. It typically takes about 48 hours, but we try our best to get them approved as soon as possible. Once your campaign has been approved the campaign status will be Active.