Video Demo
Article - Step by Step
This article will guide you step-by-step on how you can set up a Cold Traffic Campaign in Traffic Fuel.
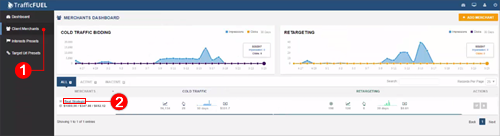
1.) Login to Traffic Fuel and then go to Client Merchants (1) and click on the merchant that you want to setup a Traffic Fuel Cold Display Campaign for (2).
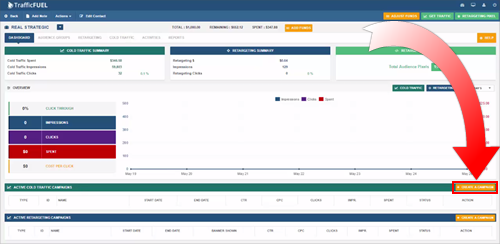
2.) From the Merchant Dashboard, go to the Active Cold Traffic Campaign area and click Create A Campaign.
Part 1: Campaign Setup
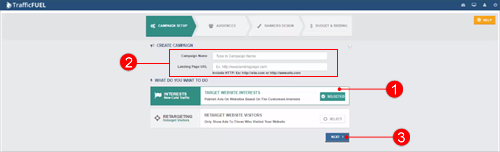
1.) Select Interests (1) and then type the Campaign Name and Landing Page URL (2). Hit Next (3) to proceed to the next step.
Part 2: Selecting An Audience
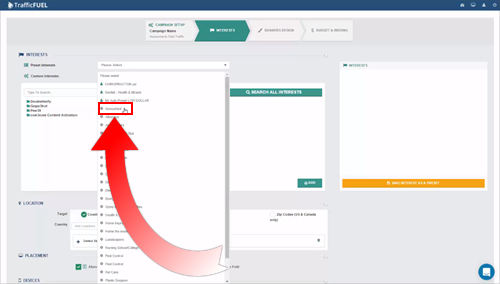
1.) This will switch to the Interests screen. Within Traffic Fuel there are a number of preset audiences, in this example, we will be selecting Accountant as our audience.
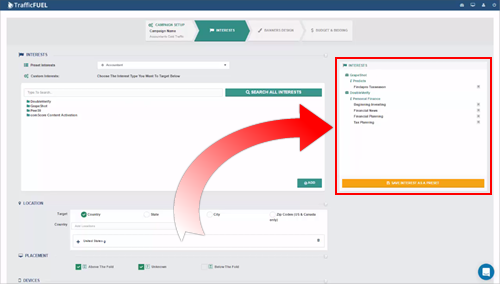
2.) Once you have selected an audience, you will see all the interests that are selected that will be a part of your campaign if you proceed with the campaign.
🛈 You can click if you want to remove a category of interests. If you want to start from scratch, you can remove all of the interests that are included here.
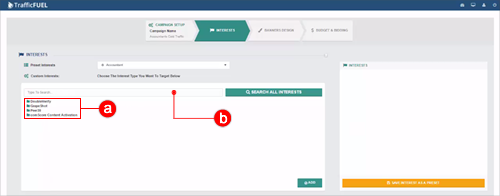
3.) You have the option to browse (a) or search (b) existing interests. The four folders are the main indexes of the combination of sites that they categorized which you can click and select the interests that you want to add into your campaign.
4.) You can also type a key for your search (1) and then hit the Search All Interest button (2). Once all the results appear, you can select what you want to add (3). Once you are ready, hit Add (4).
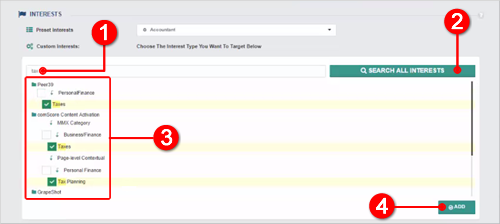
5.) You will see that they will be added on your Interests area.
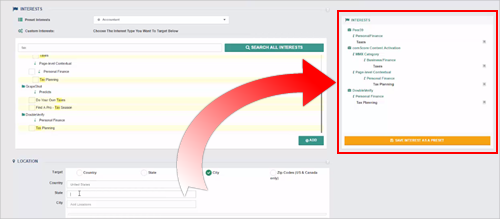
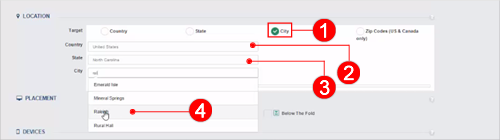
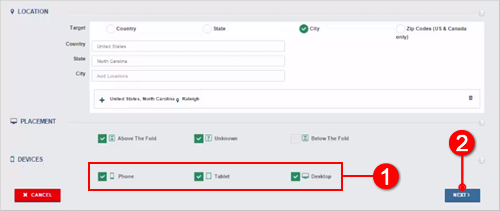
6.) The next step that you need to do is to set up on where you want to display these ads Location wise. Since we want to display the ads to a particular city, we will select City as our Target Type (1) and then type the Country that you want (2). Enter the State (3) and then select the City that you want to add (4).
🛈 You can use Country, State, City or Zip Codes Target Type depending on your requirements.
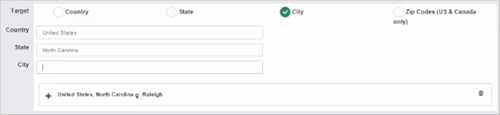
7.) You will see that your location is already listed. If you want to add more cities, you can type the city that you want and it will be added on your list.
8.) The next step is to choose where your ads will be placed.

9.) Select which devices where you wish ads to be displayed. You can select Phone, Tablet or Desktop only or a combination. Once you are ready, hit Next.
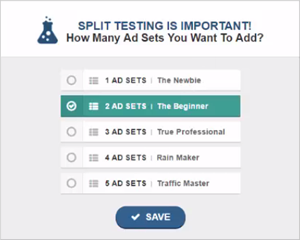
10.) If there is any error, it will popup on the top right of the page but if there is none, then you will be taken to the next section. We have two Ad Sets that we want to use so we will select the Two Ad Sets and then we hit Save.
Part 3: Banner Design
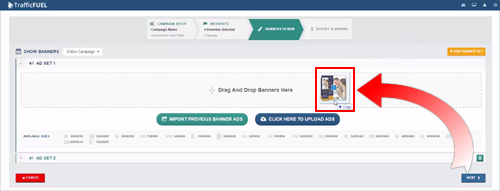
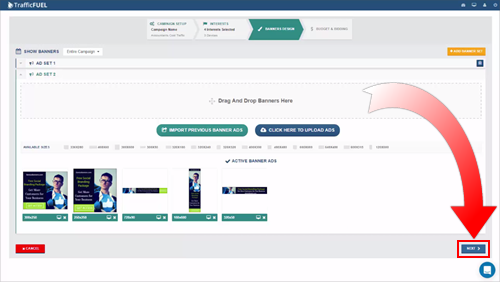
11.) Drag your banner ads into the screen or you can use the Click Here To Upload Ads to upload your banner ads.
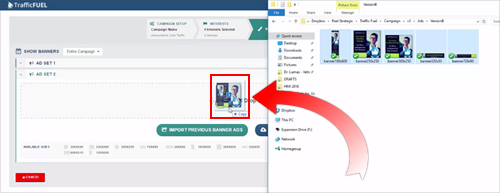
🛈 Use the Import Previous Banner Ads if you want to import ads that you have previously used in the the program.
2.) Once you have successfully uploaded your banner ads to the first set of Ads, you can click Ad Set 2.
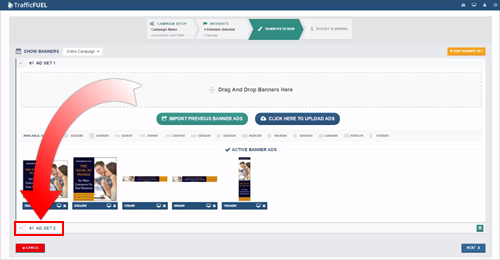
3.) Drag your banner ads into the screen.
4.) Once you have successfully upload your banner ads into your Ad Set 2, you can already hit Next to go to the final section.
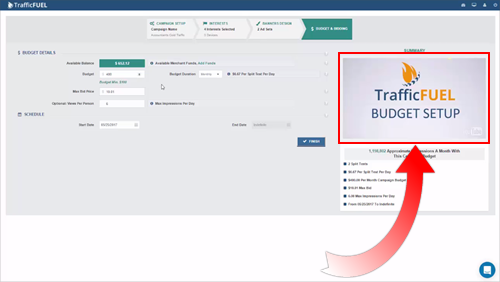
Part 4: Budget And Bidding
1.) We highly recommend to watch our video first which will give you significant details on how you can setup your budget.
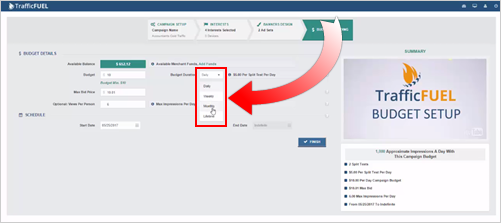
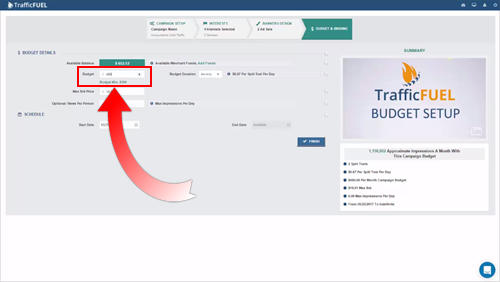
2.) Set your Budget Duration. You can select Daily, Weekly, Monthly or Lifetime. In this example, we will be selecting Monthly as our Budget Duration.
3.) Set your budget for this particular campaign which in this example is $400.
🛈 The minimum budget for a campaign is $100/month
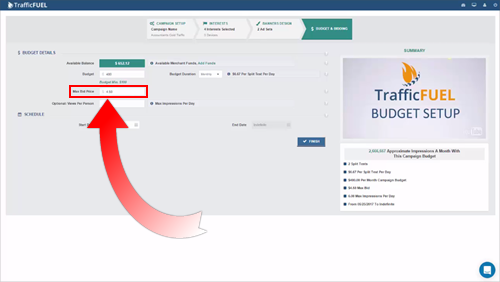
4.) Set your Max Bid. The recommended range is from $5.00-$12.00 CPM for image banner campaigns, and from $15.00-25.00 CPM for video based campaigns.
🛈 Prices can range from a few dollars to over $25.
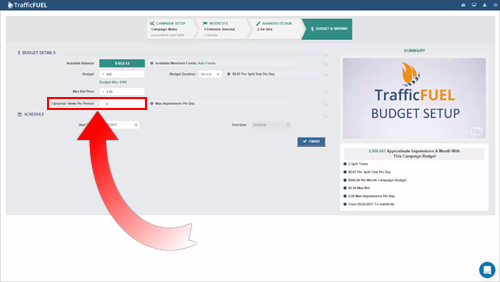
5.) Set the View Per Person to control the number of times the same person will see the ad per day. You can leave this to six (6) which is the default.
6.) Set your Campaign Duration. Once you are all set, hit Finish.
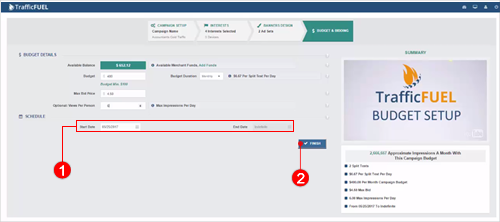
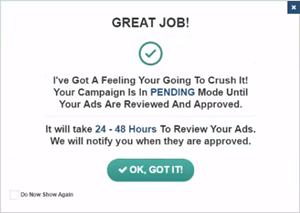
7.) Again, if there is any error, it will popup on the upper corner of your window. If your setup is successful, you will be getting this popup, hit Ok Got It! to close it.
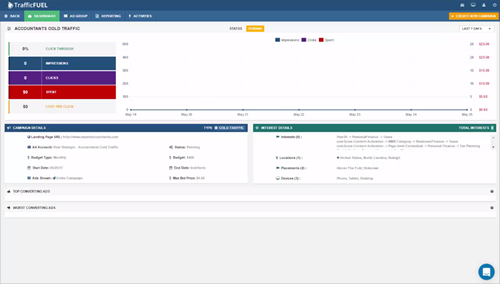
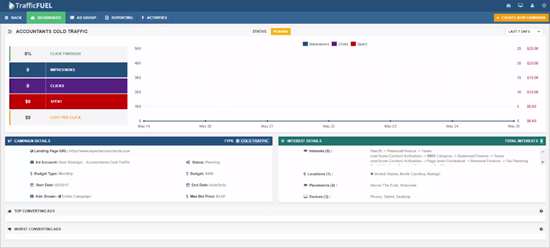
8.) If you want to monitor how your traffic is going, you just need to go back to the merchant’s dashboard and you will see all the details that you need.