When setting up the widget with the RepVideo, you will be able to decide what kind of widget to start with. You can either create an On Page Widget or a Popup Widget with the help of the wizard.
For step by step walkthrough of each of these widgets, click the quick links below:
Setting Up an On Page Widget
To set up an On Page Widget, follow the steps below:
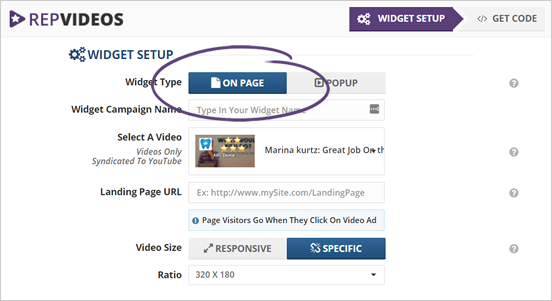
Step 1. Select On Page widget type.
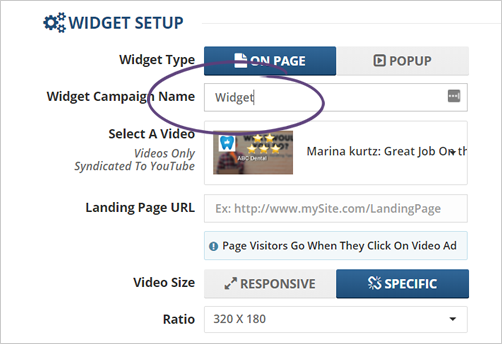
Step 2. Type in the name of the campaign.
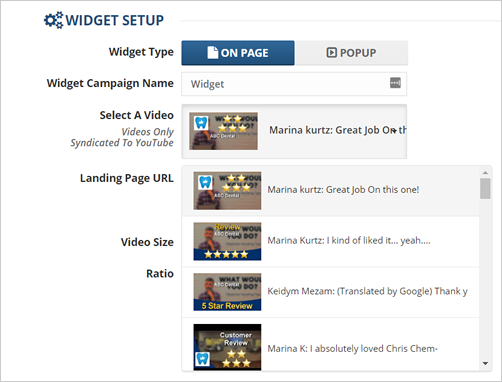
Step 3. Select a video from the videos that were produced previously.
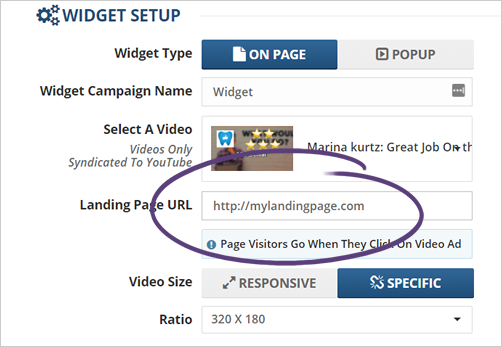
Step 4. Type in your Landing Page URL.
Step 5. Decide the widget’s size if it is going to be Responsive or Fixed.
If you are choosing a fixed widget size, you will be asked to select the size of the widget.

Step 6. Once you are done, click Next Step.
Setting Up a Popup Widget
To set up a Popup Widget, follow the steps below:
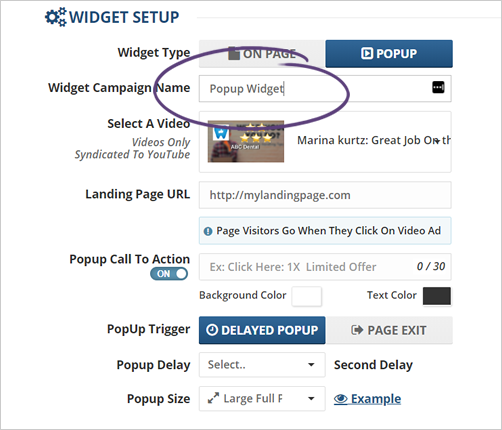
Step 1. Select Popup widget type.
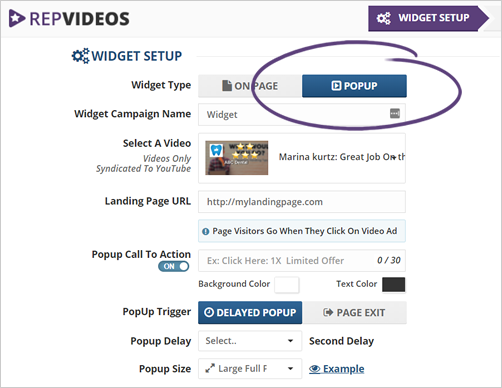
Step 2. Type in the name of the campaign.
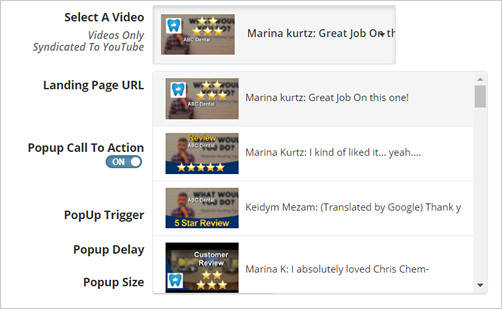
Step 3. Select a video from the videos that were produced previously.
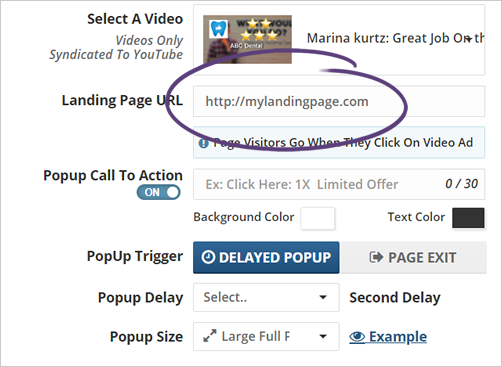
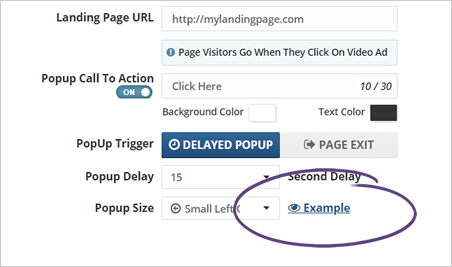
Step 4. Type in your Landing Page URL.
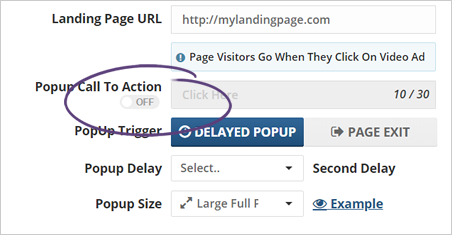
Step 5. Type in the Popup Call To Action text.
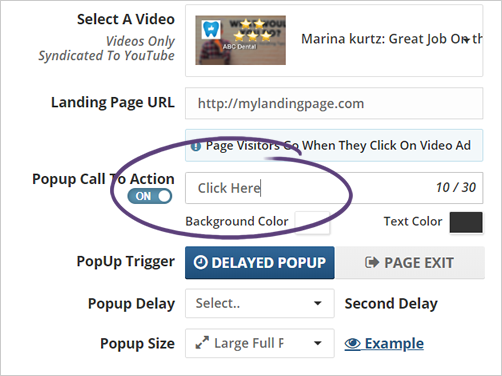
To disable this element, toggle the element to OFF.
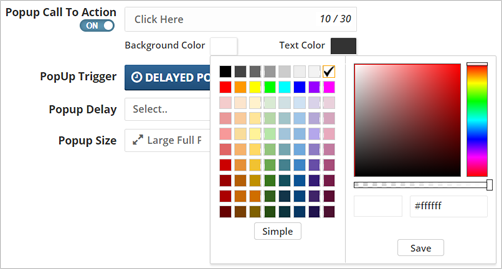
Step 6. Update the Background Color and Text Color to customize your widget further.
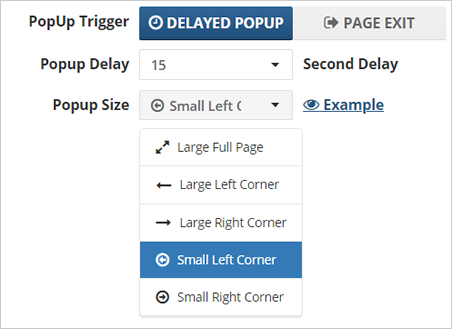
Step 7. Select how the widget will show up. You can either choose a Delayed Popup or a Page Exit. Use an Exit popup if you want your popup to appear once a user is about to leave their current screen.
Step 8. If you are using a Delayed Popup, you will be asked to set the time on how much for the user to spend on the page before it is going to show up.
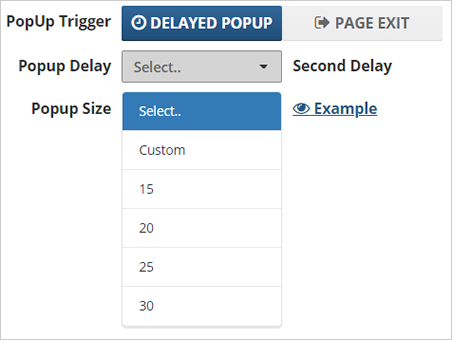
Step 9. Lastly, select your desired popup size.
Step 10. If you are not sure how the popup is going to look, click the Example link.
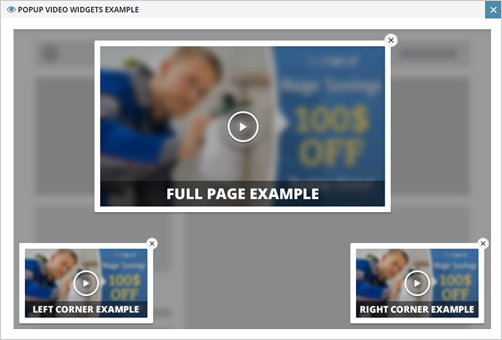
Step 11. Clicking this link will let you see an example popup on how it is going to look on your page.
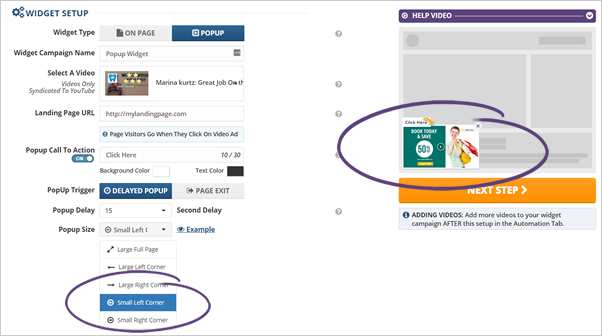
Step 12. You can also check your preview window every time you want to quickly see how the widget size is going to look on your page.
Step 13. Once you are done, click Next Step.
Related Articles:
Widget Step 2: Getting Code
Widget Dashboard
Create Widget Pop Up