The Super Ad Template is the area where you make significant changes to your ads. Keep in mind that it is a super ad template, which means that several items are locked down.
You can change your text, but you cannot move the text area all over the place on the canvas. The idea of the super ad template is to modify and replace and not to make major adjustments to the ad itself.
Here are the steps on how you can modify your super ad template:
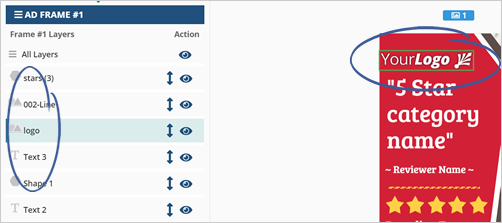
Step 1. Once you are in edit mode, you are going to see the different layer areas. Hovering to an element will highlight an element on your preview window.
Step 2. To hide an area that you want, click the eye icon.

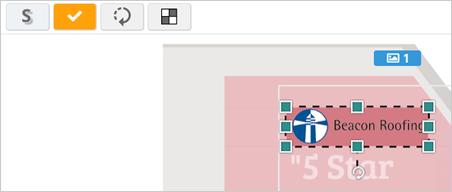
Step 3. Once you single-click an area in the preview window, you will notice that your navigation will change.
This action lets you start modifying that particular element.
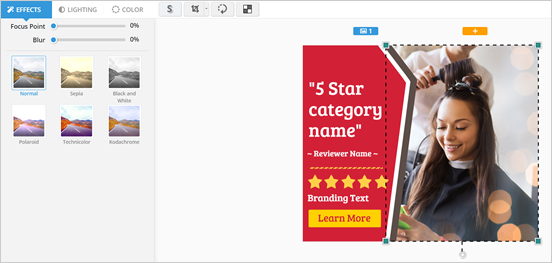
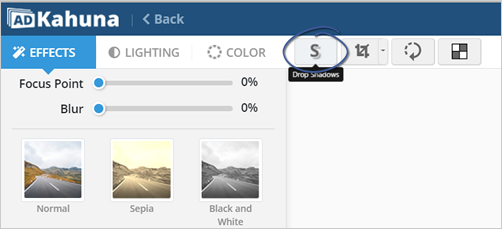
Step 4. You can apply different filters, too, if needed.
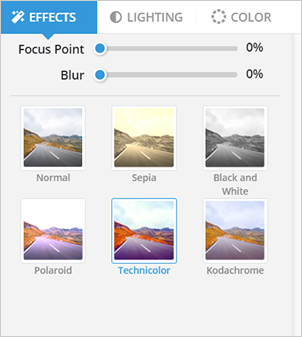
Step 5. Use the other tools available such as dropping a shadow, cropping the image, or flipping the selected object.
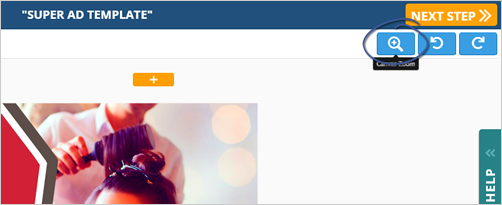
Step 6. To zoom in or out a canvas, use the canvas zoom tool.
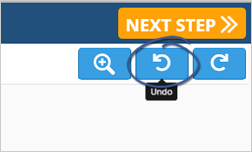
Step 7. You can also undo or redo the changes that you have made.
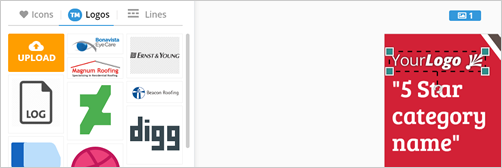
Step 8. Once you double click an element, you will now be able to replace it. You can use the available logos that are available on the left side of your screen.
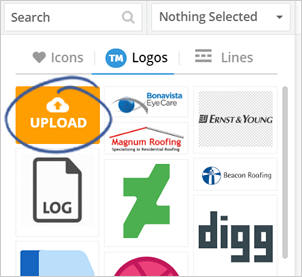
Step 9. If you want to use your logo, click Upload.
Step 10. Crop your logo if it does not appear correctly. Once you are done cropping the logo, click the check icon.
Step 11. To change the ad’s main image, double click on that element and select from the available images displayed.
You can search a specific niche by typing directly on the search box.
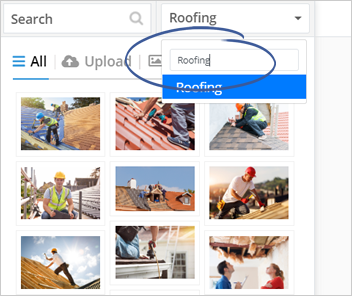
Again, you can upload your image here.
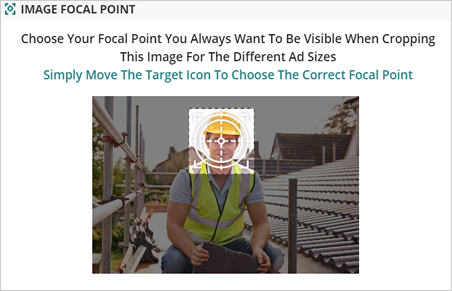
Step 12. When you successfully change the image, it will ask you to pick a focal point.
Keep in mind that you need to be aware that not all ad sizes will take an entire photo when you make an ad in multiple sizes.
Step 13. Once you are done, click Save.
Step 14. Replace a text by clicking on the element and typing in your new text.

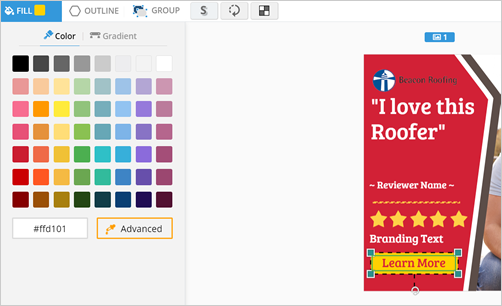
Step 15. Change the button color by clicking on the element and selecting the color of your choice from the available colors displayed.
Step 16. Turn this ad into a motion ad by adding an ad frame.
When adding another frame, make sure to add a few changes to it. These changes will make your motion ad more noticeable.

Step 17. Click Preview to see how your motion looks.
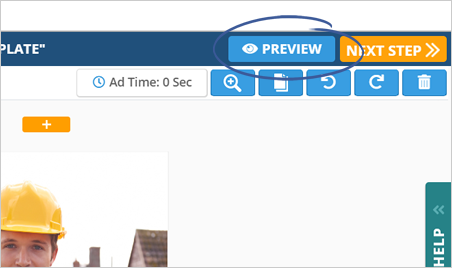
Step 18. Once you are done editing your super ad, click Next Step.
Related Articles:
The Difference Between Emailing Drafts and Final Previews
Picking Ad Sizes
Selecting a Template
Preview Edit Screen
Editing Individual Ad Sizes
How to Save Ads from Scratch