Now that you have successfully logged in to Funnel Maps, you are ready to start setting up your account. We made the setup super easy for you with the help of the setup wizards.
In the setup wizard, you will be presented with three easy steps:
Filling Up Your Agency Information
To start filling up your Agency Information, follow these steps:
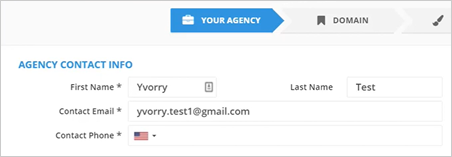
Step 1. Set up your Agency Contact Information.
Step 2. Set up your Agency Information.
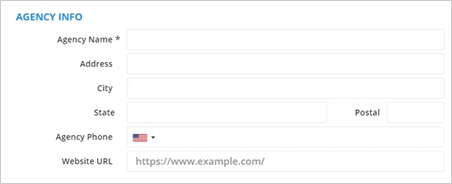
All the fields marked with an asterisk are required fields.
Step 3. Once you are done setting up all the required information about your agency, click Next.
Creating Your Domain
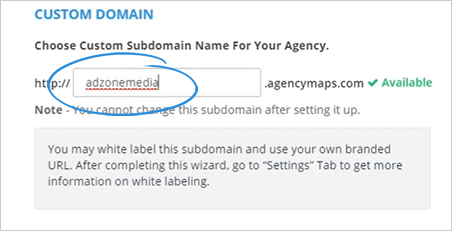
This next step will let you choose a custom subdomain for your agency.
If you like to use your own branded domain, you will be able to white label this subdomain later in the settings area.
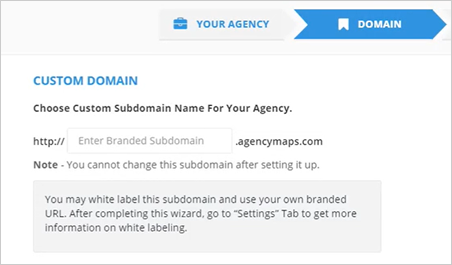
You can not change this subdomain after setting it up. We suggest using the name of your agency as the subdomain.
Enter the name of your agency (without spaces) and click Next.
Agency Branding
The third and final step of the wizard lets you set up your Agency Branding. You must have your agency branding on here, such as your company name, company logo, and company colors. So as you start selling in marketing Funnel Maps as a service, it will be branded to your agency.
To customize Funnel Maps to your agency’s branding, follow these steps:
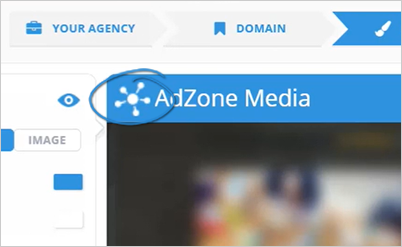
Step 1. Update your company logo by clicking the default logo on the preview window.
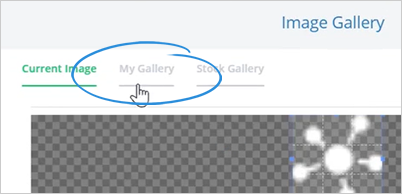
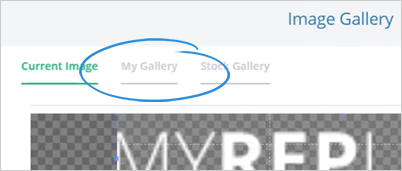
Step 2. Click the My Gallery tab.
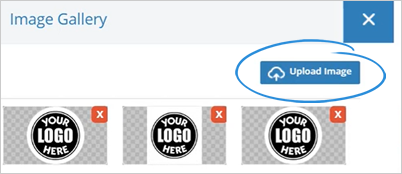
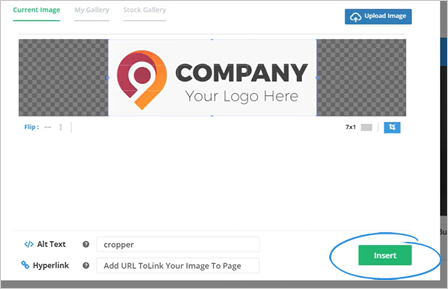
Step 3. Click the Upload Image button and upload your logo.
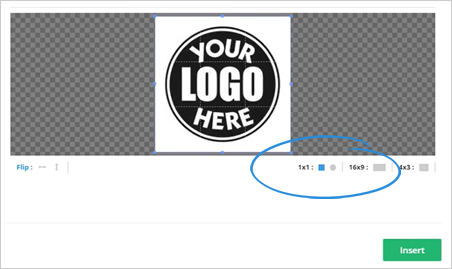
Step 4. Set your preferred aspect ratio and click Insert.
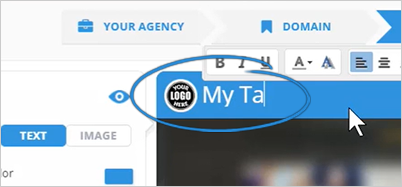
Step 5. Next, customize the text of your header. By default, it will show you the agency name you have specified in step 1.
To change this text, click on the text area and update it.
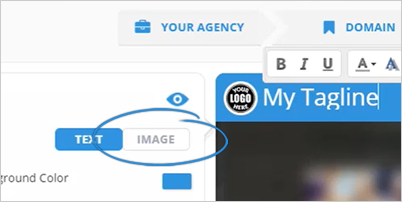
Step 6. You also have the option to use an image on this section by switching to an image branding.
Step 7. Click My Gallery tab.
Step 8. Click the Upload Image button and upload your logo.

Step 9. Click Insert.
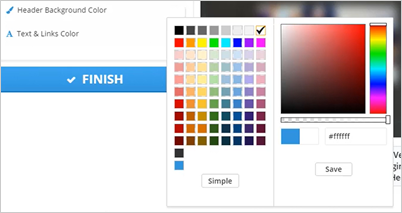
Step 10. You can also customize the background color of your header and color of the text and the links using the Header Background Color element.
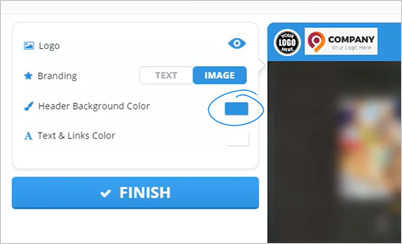
Step 11. Select a color and click Save.
Step 12. To change the color of the text and links, click the Texts & Links Color element, select a color, and click Save.
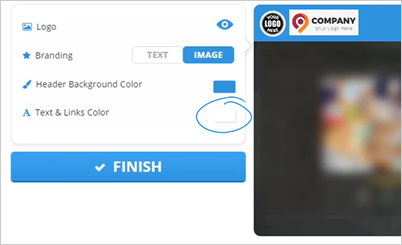
Step 13. Once you are done customizing your agency branding, click Finish.
Related Articles:
Step 1: Login to Funnel Maps
Step 3: Whitelabel Setup
Step 4: Bonus Done-For-You Agency Website
Step 5: Adding a Business
Step 6: Creating Your First Funnel Map
Step 7: Join Your Weekly Friday Live Training