Landing Page Retargeting
The Retargeting Tab is where you can setup your Retargeting Pixels. Retargeting a Pixel Code allows you to track the viewers who came to your Landing Page and retarget them to your offer later on. In this article, we will walk you through on how to Retarget a Pixel using our proprietary traffic platform, Traffic Fuel.

Follow these steps on how you can use your Traffic Fuel as your Retargeting Pixel into one of your Local Analyzer Landing Page.
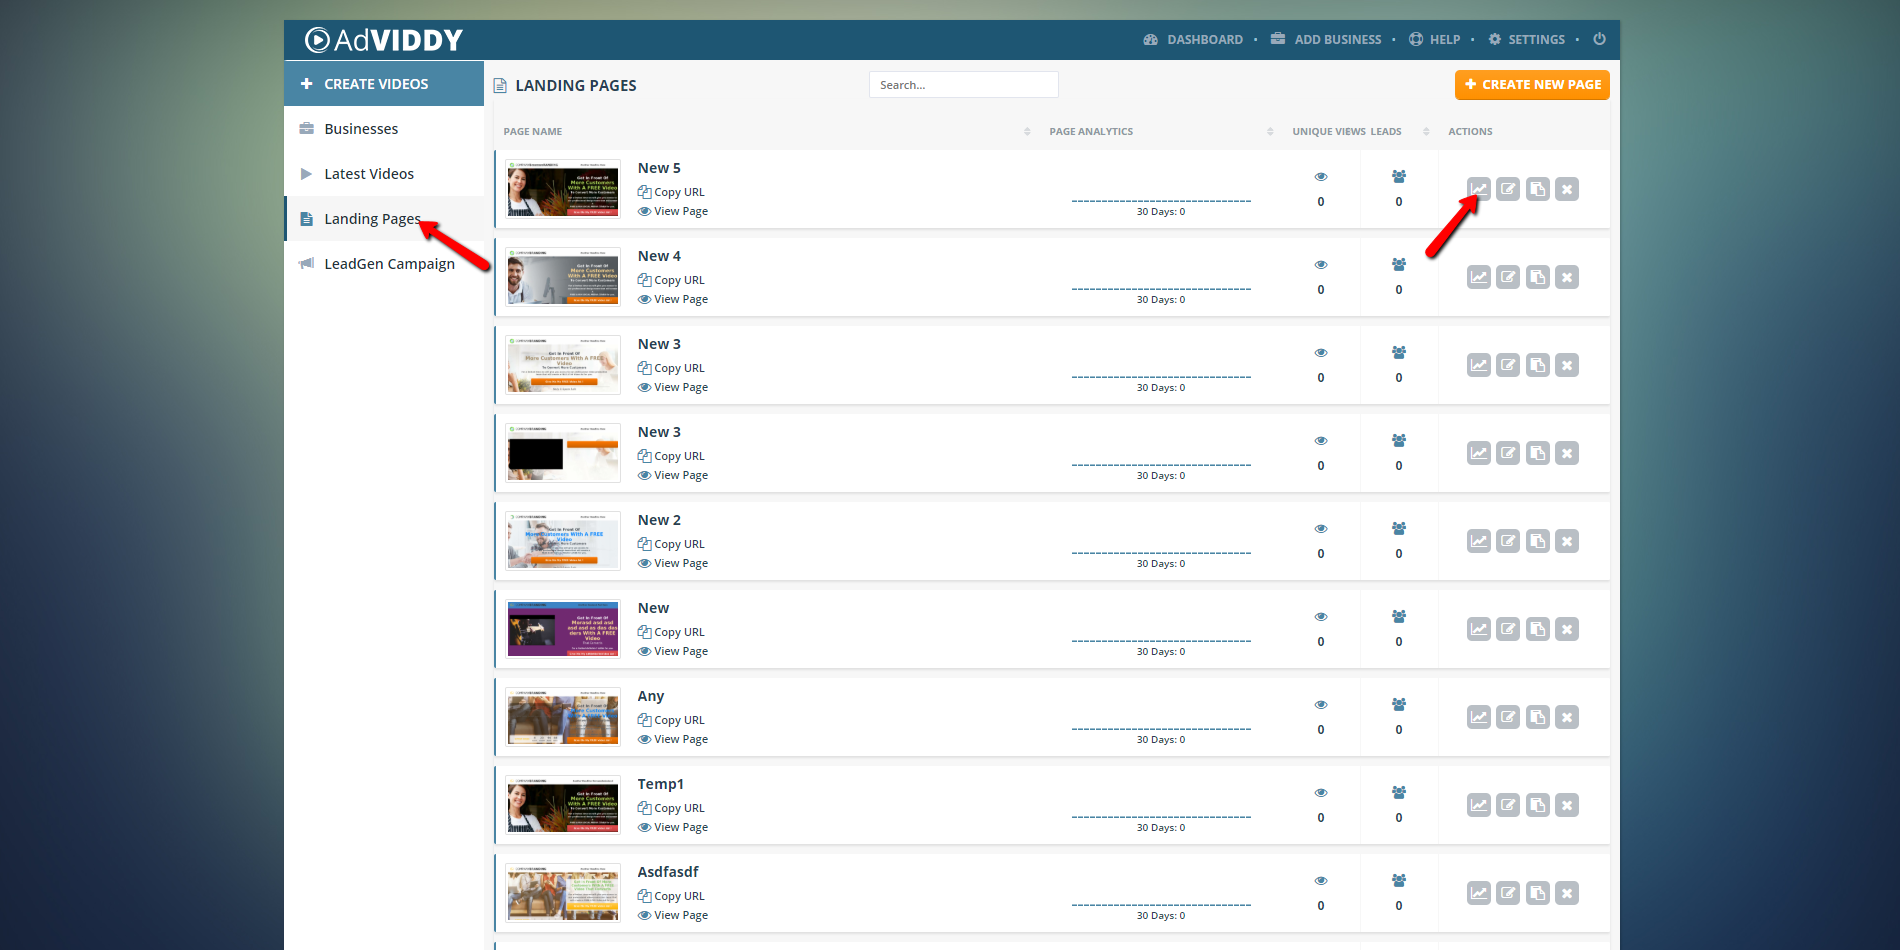
- Go to ‘Landing Pages’ then click the ‘Dashboard Page’ icon (
 ) on the Landing Page that you want to set up.
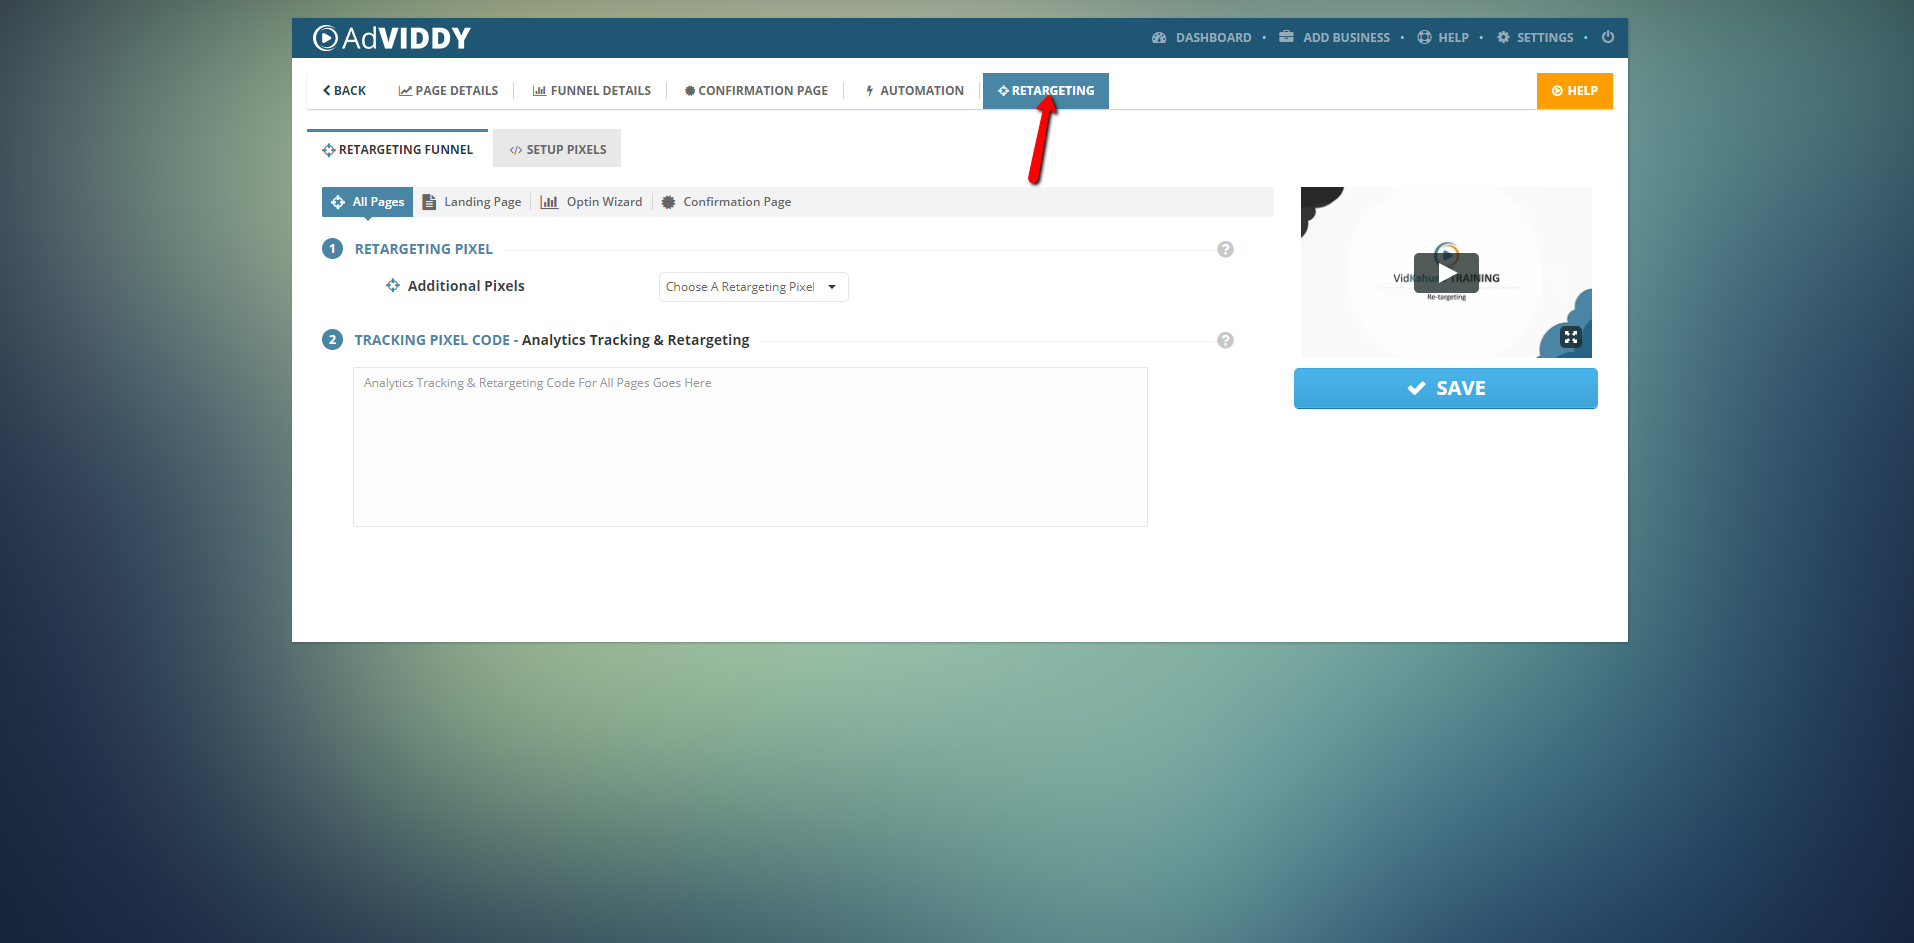
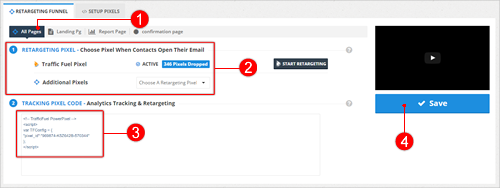
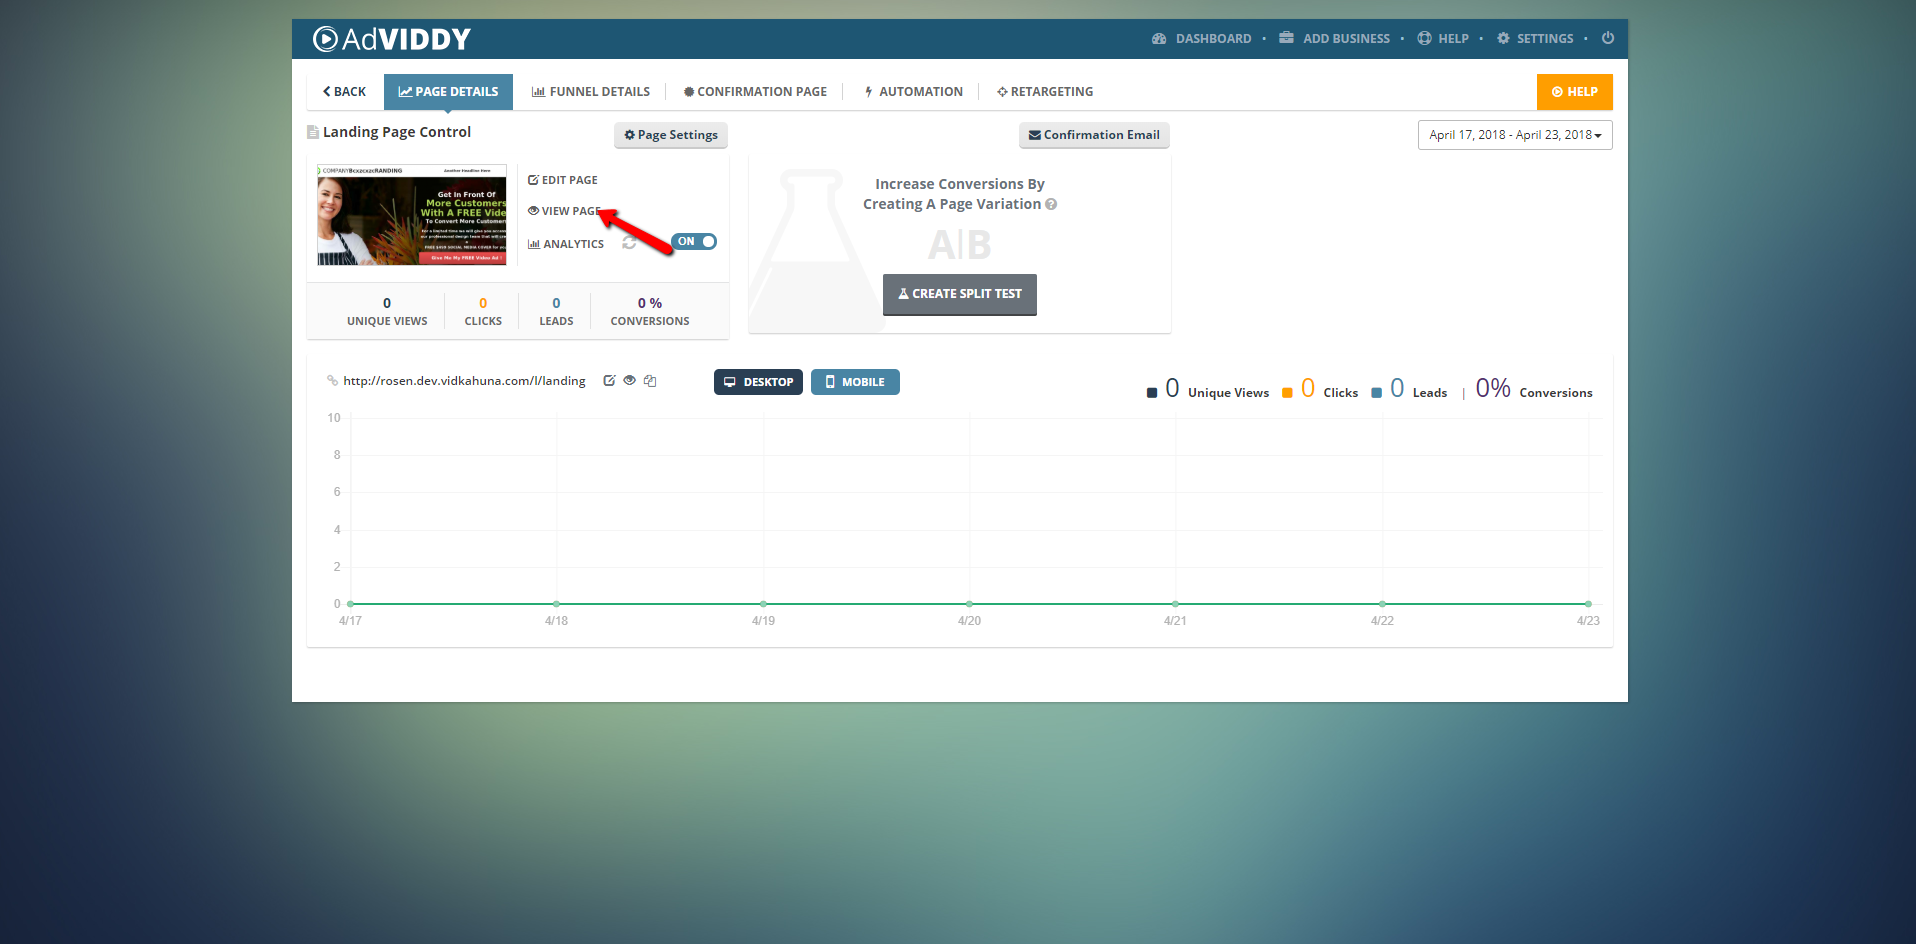
- Now on the Landing Page Control Dashboard, click Retargeting.
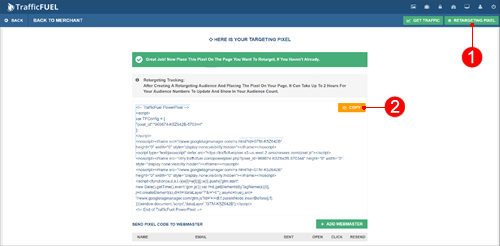
- Now login to your TrafficFuel account and setup your Retargeting Campaign. On your campaign, click on Retargeting Pixels to be able to access the Retargeting Pixel Code and hit Copy.
- Make sure that Traffic Fuel is the Retargeting Pixel that you have selected then paste the Retargeting Pixel Code you have copied from your TrafficFuel Campaign into the All Pages tab. You can up to two Retargeting Pixel here that will track viewers who landed on your Landing Page. Whenever you are done and ready, hit Save.
🛈 You can also add the code to the Landing Page, Lead Wizard or Thank You Page, only to retarget on those viewers who went on those specific pages. We recommend to always add the code to all of your pages.
Testing Your Retargeting Pixel Code
To test if your Retargeting Pixel Code is added to your page, follow these steps:
- Go back to your Landing Page Control Dashboard and click View Page.
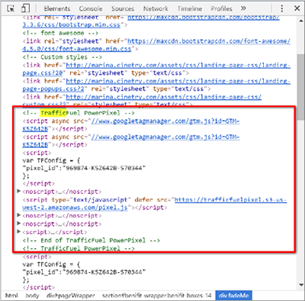
- Once your page opens from your browser, right click on the page and click Inspect. You can also press Ctrl+Shift+I on your keyboard. This will let you see the actual code of the Landing Page.

- In the search box, type “Traffic” to see if the Traffic Fuel Pixel Code is integrated on your page.
🛈 If you can not find the search box, you can press Ctrl + F on your keyboard.