In this article, we will show you ways to review the posts that you have scheduled through the Single Post or Multi-post setup
Complete the following steps to view and track scheduled posts:
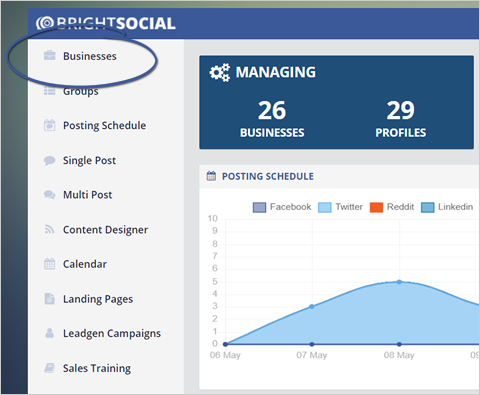
Step 1. From the main dashboard, click Businesses.
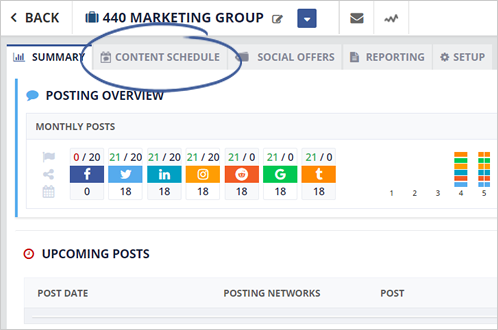
Step 2. Select a business from the list of active businesses.

Step 3. Click the Content Schedule tab.
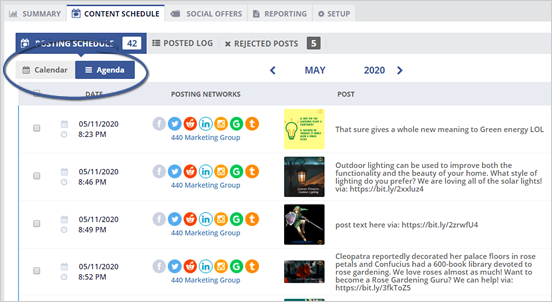
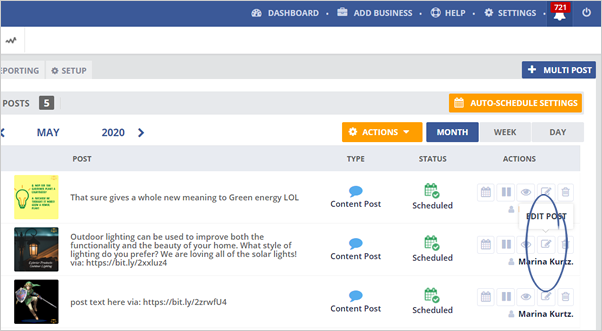
Step 4. You can view a business’s Posting Schedule in both Calendar and Agenda view.
Click a tab to switch views. If you accessed your posts from the Calendar tab, the icons would have a different appearance, but they will function the same.
Step 5. Click the Eye icon to preview your post.
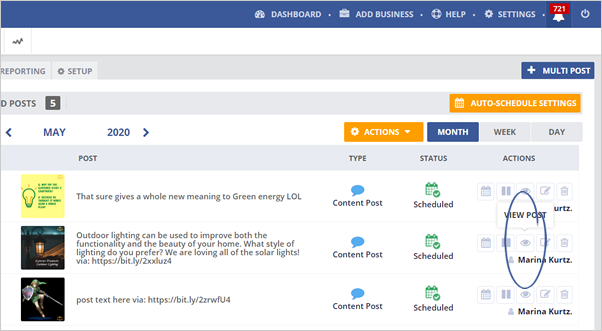
Step 6. To edit a post, click the Edit icon.
Step 7. From here, you can also change the content of your post and turn on and off sharing to various social media networks.
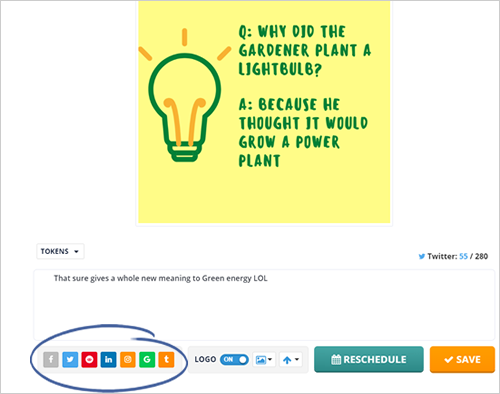
Step 8. Once you are done, click Save.
Related articles:
How to Edit the Posts
How to Create a Single Post
How to Create a Multi-Post