
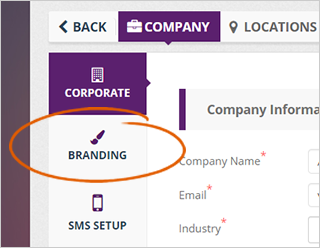
Step 2. Click Branding.
The Company Branding page lets you customize your merchant’s branding across their Feedback Page, Training Center, Media Center, or even their Email Header.
To successfully set up your merchant’s branding, follow the steps below:
Step 1. From the company’s dashboard, click Setup.
Step 2. Click Branding.
Step 3. Click the Header Color tile to select a color for the header.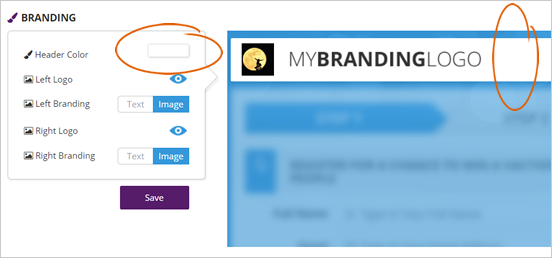
Step 4. Decide if you want to use Text or Image for the Left Branding.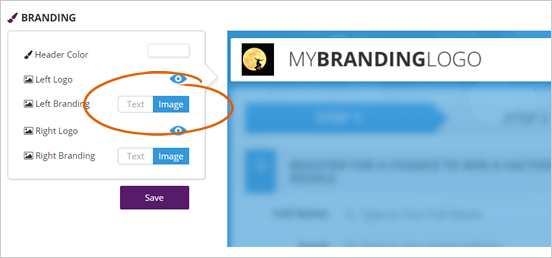
Step 5. Hover your mouse over the Left Branding element and click Update. Start uploading your logo or use the available images found in the gallery.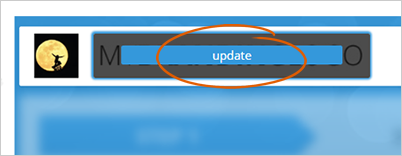
Step 6. If you want to hide the Left Logo element that is displayed on the company branding, click the eyeball icon.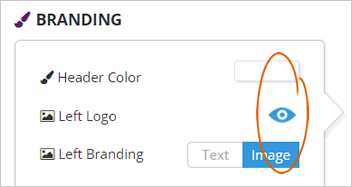
Step 7. Decide if you want to use Text or Image for the Right Branding.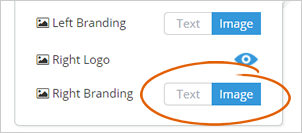
Step 8. Hover your mouse over the Right Branding element and click Update. Start uploading your logo or use the available images found in the gallery.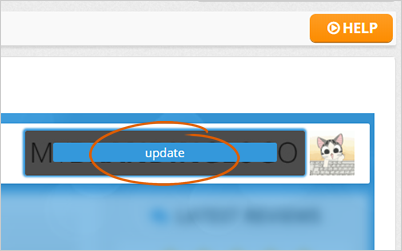
Step 9. If you want to hide the Right Logo element that is displayed on the company branding, click the eyeball icon.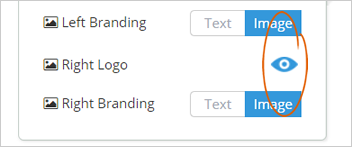
Step 10. Review the company’s branding on the Preview Window. If you think the design does not need any more changes, click Save.
Related Articles:
Your Company Setup Screens
How to Add a Location Token
Company Dashboard: Single Location
Company Dashboard: Multiple Locations
How to Update Company Branding
New Company Setup