To create a Voice Broadcast, follow these steps:
1.Go to ‘Marketing’ > ‘Broadcast’ and click the ‘Create New’ drop-down. Since we want to create a new voice broadcast, choose ‘Voice Broadcast’

-
You may also go the Voice Broadcast tab and click ‘Create New’.

-
Type the name of your New Voice Broadcast and then click ‘Next’.

- This will take you to the Voice Broadcast Setup. The first step in your setup is selecting the leads you want to sent the Voice Broadcast to. This setup is similar to the Email Broadcast setup where you can add your saved list. Click the ‘Add List’ button to start adding your list.

-
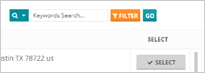
Next to the ‘Add List’ function is the ‘Search’ function which lets you search for a specific contact.

- You can also apply filters here and open the search column and apply the filters to filter down your list.

- Once completed, you will see all your selections as well as the total of how many contacts will receive your Voice Broadcast.

- Next, add the Broadcast Number that you want to send out the calls. This will display all the numbers that you have configured in Twilio.

- Set up your Call Transfer. If someone presses the Call Transfer button, it will connect that person with you so you can speak to them live. The Call Transfer number here should be your business number or cell phone number, wherever you are actually will receive the call from the leads that hit the call transfer button.
Turning this off will disable Call Transfer on your voice broadcast.

- Next, configure how many simultaneous calls you would like to send at a time.
🛈 Only set this to a high number if you are not utilizing call transfer. If you have enabled Call Transfer and a high call number, the more calls that are going out the same time, the more people are going to transfer the call at the same time and you would not be able to handle all the inbound calls.

-
Upload your MP3 file using the ‘Upload’ button. There are two options here:
- Live Person - Upload MP3 for when a live person answers the phone.
- Answering Machine - Upload MP3 when a voice broadcast answers a machine.
🛈 Files should be in MP3 format and under 3 MB each. Once you have uploaded the files, the name of the MP3 file will show on the right-hand side and both the Live Person and Answering Machine toggles will activate.

Once you are done, Click the ‘Next Step’ button.
- The next window will display the overview details of your Voice Broadcast. This includes the total number of contacts in the broadcast, the Broadcast Number, if Call Transfer is enabled, and if both Live and Answering Machine options are enabled in your Voice Broadcast.

13. Lastly, you can send your Voice Broadcast immediately by clicking the ‘Now’ button or if you want it scheduled, click the ‘Schedule’ button and set the date and time on when the campaign will be sent out.

Note:
Select the time zone that you would like to send the Voice Broadcast at. Keep in mind that this is going to send all the broadcast at one specific time zone. If you have contacts inside your Voice Broadcast contact selection that are in the different time zones, please be aware of what time you are calling them at with this broadcast.