In this article, we will explain how to create a Single Post that can be scheduled for any business or several businesses in Bright Social.
Complete the following steps to create a single post:
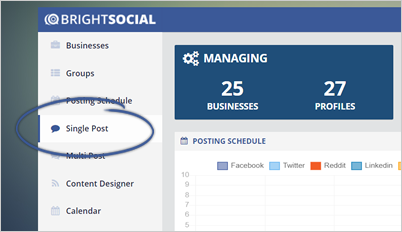
Step 1. Click Single Post from the main dashboard.
2. Type or paste your post.

Note: If you add the link to the Post area it will automatically turn into a bit.ly link and will pull the image from the resource automatically.
Step 3. If your content contains a URL, we will automatically fetch the image and shorten the URL. Upload an image if needed. 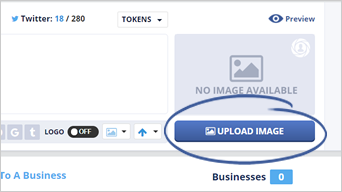
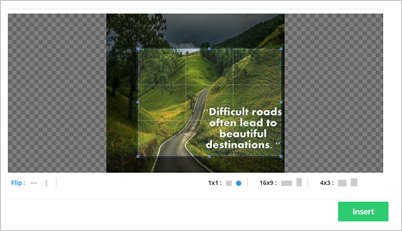
Step 4. Once you have uploaded an image, crop it to your desired size image, and click Insert.
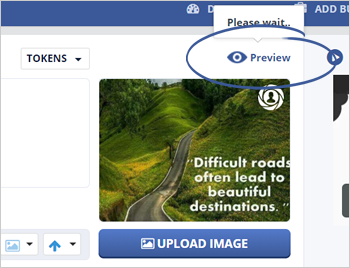
Step 5. Preview your posts by clicking the Preview button.
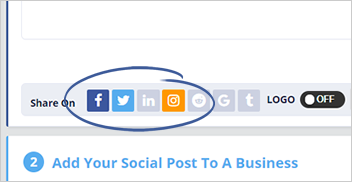
Step 6. Select which social media networks your post will be shared.
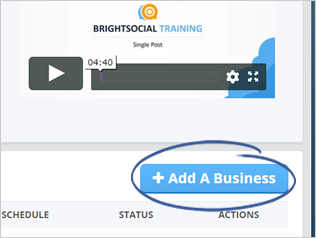
Step 7. Click the Add A Business button.
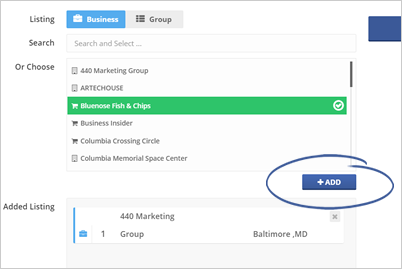
Step 8. Select a business or group and click the + Add button. Once you are done, click Save.
To add multiple businesses or groups, repeat this step.
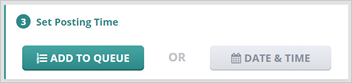
Step 9. Click Add to Queue or Date & Time.
Clicking Add to Queue will only publish your post if you have enabled the auto schedule. On the other hand, clicking Date & Time lets you pick a date and time on when your post will be posted.
Step 10. Click the Send to Schedule button to complete your post.

Related Articles:
Scheduling Multiple Posts in BrightSocial
How to View and Track Scheduled Posts
How to Edit a Scheduled Post
How Do I Change the Date / Time for a Post in the Posting Schedule
How Do I Delete a Post From the Posting Schedule