Adding a business lets you add a business contact into Social Covers to start sending them Social Cover Sets.
To add a new business, complete the following steps:
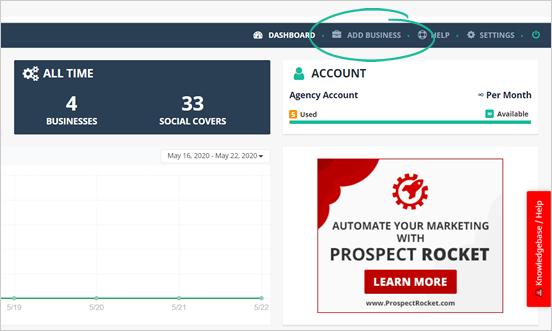
Step 1. On the upper right-hand corner of the page, click Add Business.
Step 2. Select Business Type.
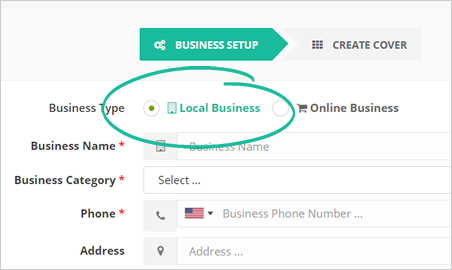
Step 3. Type the name of the business.
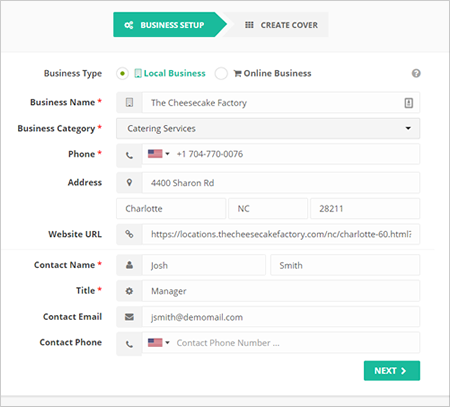
Once the name of the business appears, click it. Be sure that you are selecting the right business from the list.

Step 4. Make sure to complete all fields marked with an asterisk that and click Next.
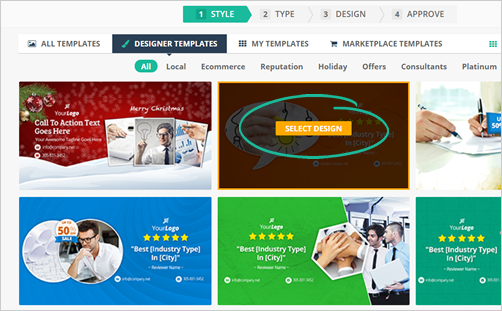
Step 5. Hover your mouse on the template that you want to use and click Select Design.
Once you are done, click Next.
Step 6. Type the name of your Cover Set.
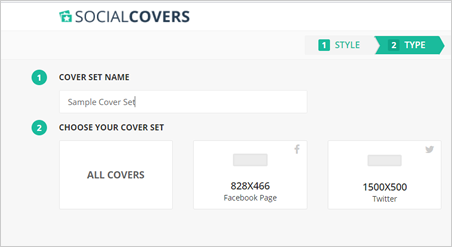
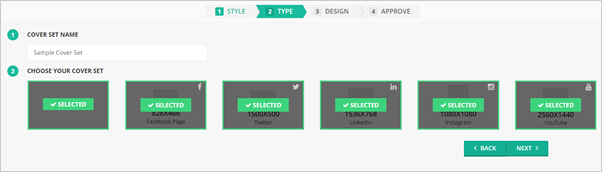
Step 7. Select the covers you need to include in your Cover Set. Once you are done, click Next.
If you have AdBlock Plus or any similar extension installed, please disable it before proceeding to the Design Section. Social Covers uses a flash-based editor and might not function correctly if AdBlock is active.
Step 8. Design and fully customize your cover using the different Element Controls available on the left side of the page.
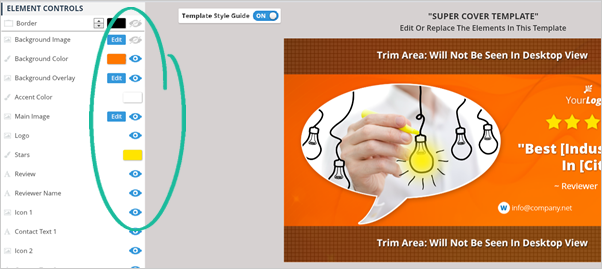
Learn how to use your Element Controls here.
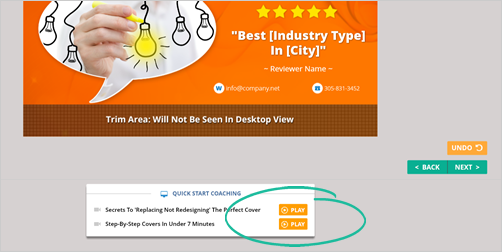
Step 9. You can also watch our Quick Start Coaching Video and learn how to create the perfect Social Cover.
Step 10. Click Next to finalize the cover.
Step 11. If you need to edit all your covers, click Edit Covers.

Step 12. Click Approve All when you are fully satisfied with the design of your covers.
When you have approved all the covers, you will be redirected to a download page.

Step 13. You can download all of them by clicking Download All Covers.

Step 14. If you need to download a single cover, select the cover that you need to download and click the Download icon.

Related Articles:
How to Create a Cover in Under 7 Minutes
How to Automate Cover Updates
How to Fulfill Social Covers
How Do I Set up My Social Media Accounts