If a customer leaves negative feedback, they are automatically sent in the Apology Campaign. As a part of your campaign, you can send a promotion to those customers who left negative feedback, sending them a reward for their engagement.
To set up your Promotions, follow these steps:
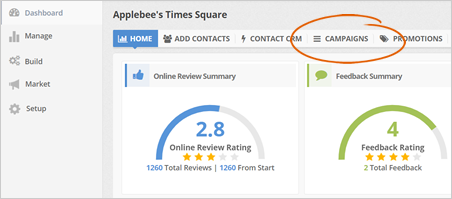
Step 1. From the company's dashboard, click the Campaigns tab.
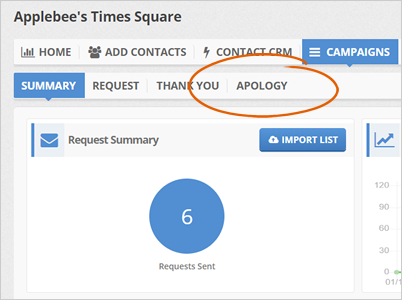
Step 2. Click the Apology tab.
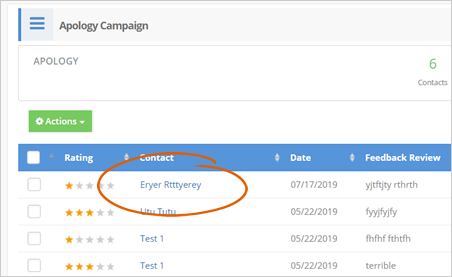
Step 3. Select a contact that you want to send your promotion from the list.
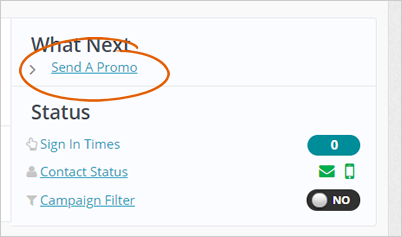
Step 4. Click the Send A Promo link.
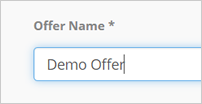
Step 5. Type your Offer Name.
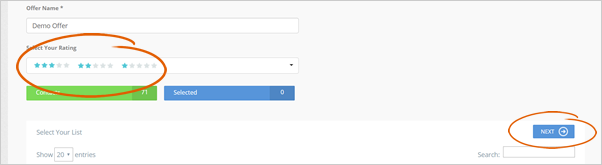
Step 6. Since we want to send promotions to our customers who left a Negative Feedback, you will be selecting one star, two stars and three stars.
Remember that when you get feedback that is less than four stars, this will be automatically be categorized as Negative Feedback. If you want to send Promos to your customers who left positive feedback, you can do that as well by selecting four stars and five stars under the Select Your Rating drop-down.
Step 7. You will notice that as you select the stars for your rating, the reviews that have the corresponding star will automatically be selected. Once you have set up your rating and the corresponding reviews are chosen, you can click Next.
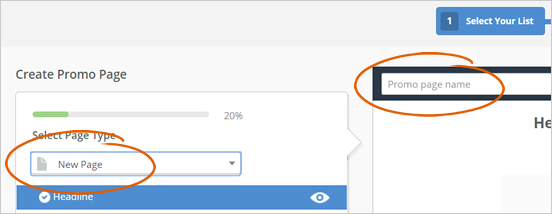
Step 8. You can use your existing Promo Page if you have one, but since we want to create a new Promo Page, select the New Page option from the drop-down list and type the name of this new Promo Page.
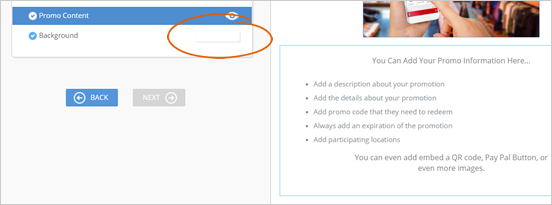
You can click the eyeball icon if you want to hide a field.
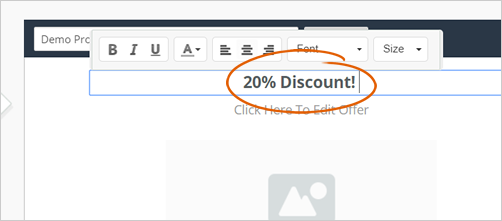
Step 9. Type your headline. If you are going to add a sub-headline, you can go to the Sub Headline field and type from there.
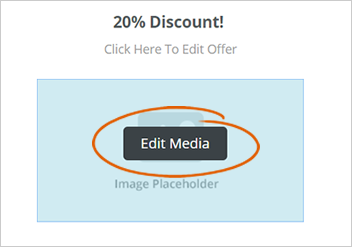
Step 10. Add an image or video to make your Promo Page astonishing, encouraging customers to engage in your page.
Hover your mouse on the Media element, and once the Edit Media button pops up, click it then upload your image or video. If you want to use our built-in photos, you can go to the Stock Gallery and choose the right image for your page.
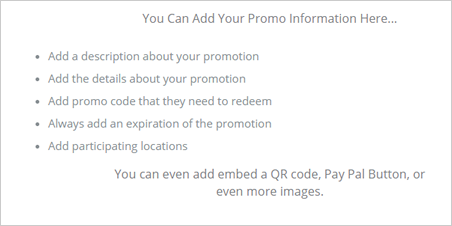
Step 11. This section is vital because it contains all the information about your Promo Page.
Describe the benefits that they will be getting to engage more customers into your page.
Step 12. If you need to change the background color, click the background, and select a color from the color picker. If you are satisfied with the design of your Promo Page, click Next.
Step 13. This next section gives you the ability to create your email content. In here, you must add tokens and your Promo Page link where users can click and see what you are offering them.
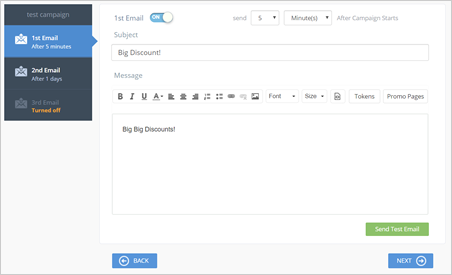
We have included a preview of this actual email so you can see exactly how it looks like when your customer receives this email. You can always use the Send Test Email to test out how your email looks like before sending them to your customers.
Click Next to finalize your campaign.

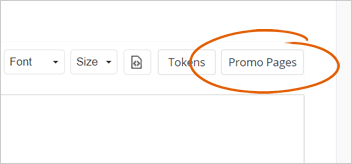
To add a Promo Page, you can click Promo Pages token and select the pages you want to include in your message. The same process goes to your other tokens when you want to add them.
Step 14. Review your campaign's details and schedule it on when it will go out. Remember that you can send up to 50 Promo Emails daily for this particular campaign, and if you want to generate this campaign already, click the Schedule Promo button.
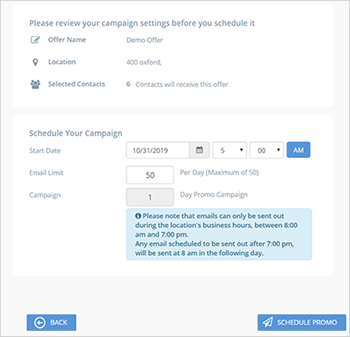
Emails can only be sent out during the location's business hours, between 8:00 am and 7:00 pm. Any email scheduled to be sent out after 7:00 pm will be sent at 8 am the following day.
Related Articles:
Promotion Dashboard Overview
Social Marketing Overview
Website Marketing Dashboard
Market Dashboard Overview
Message Center
Tour of Your CRM Dashboard