How To Create A New Lead Capture Form
This article will demonstrate step-by-step on how you can create a new Lead Capture Form.
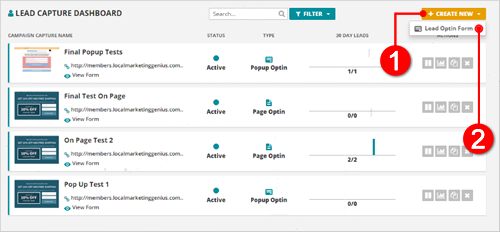
1. Creating A New Form
1. To start, from your Lead Capture Dashboard, click Create New (1) and then click Lead Option Form (2).
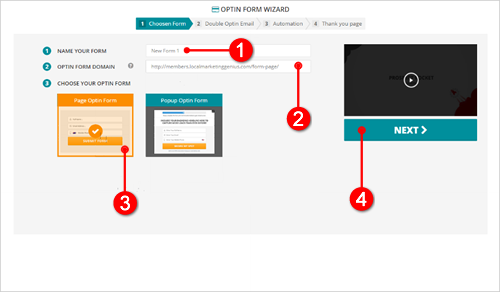
2. Type the name of your form (1) and then paste the domain where you will be listing the form (2). Select your Optin Form (3) and once you are done, click Next (4) to go to the next step.
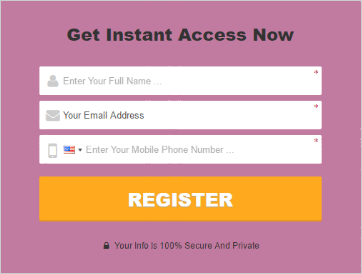
🛈 A Page Optin form is an on page optin form while the Popup Optin Form is a button that goes on the page when they click it, it pop up the optin form.
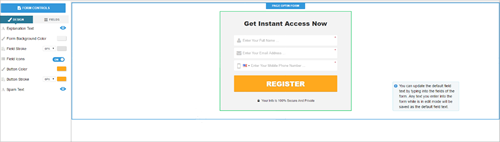
3. You will be redirected to different element controls of your Page Optin Form that gives you the ability to edit each one of them. Everything on the right side of the page is editable.
🛈 Each field has a corresponding control. So if you want to show or hide a field, click  . If you want to change the color of your form’s background color or the button color, click
  and then you can select from the hundreds of colors available from the color picker. Lastly, toggle
  if you you want turn On or Off your form’s Field Icons.
2. Adding Custom Fields
1. To add custom fields into your form, go to the Fields tab.

2. From this point, you have the ability to set whether you want the form to capture Individual or Business Contacts.
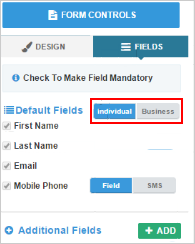
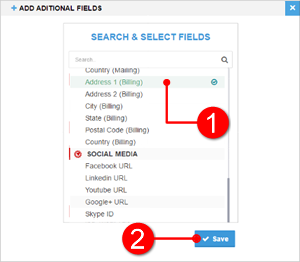
3. Click Add to start adding new fields. Select the Prospect Rocket field (1) that you want to capture and then click Save (2).

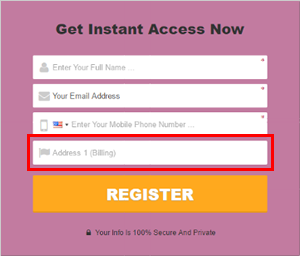
4.You now see that the new added field will appear on your form.
🛈 Whatever fields you choose under Additional Fields that is where the information for that box is going to map inside of your Prospect Rocket account.
5. To remove that additional field click on the Trash icon  . Once you are fully satisfied with your form setup, hit Save found on the top of this page to apply the changes you have made and then hit Next to proceed to the next step.

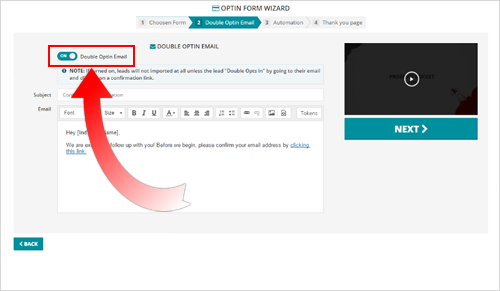
3. Double Optin Email
1. This next step in your wizard which lets you set up your Double Optin Email. This email means that the user needs to confirm their email address before a contact is created for them. After they fill in the form, they will be sent an email with the link for them to click to confirm their email.
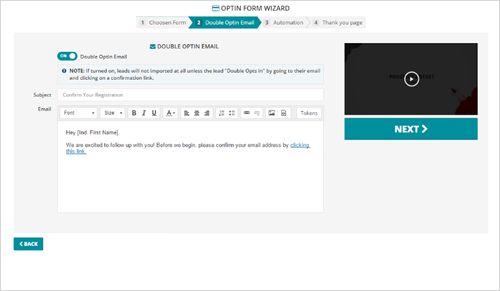
2. We already have a default template added here which has a Subject Line and a basic message which is editable. We also have tokens that you can use inside of your email.
Note:
⚠ Keep in mind that the Confirmation Link field is required for this Double Optin Email which will let the user to double confirm their email address.

3. You can also Turn Off Double Optin Email on your form if you do not want to use it. When you are ready, hit Next.
4.Automation
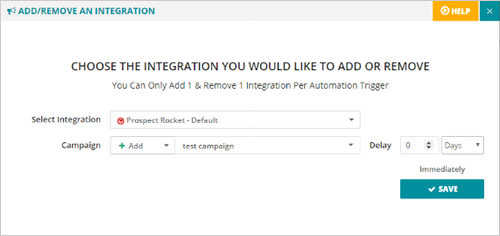
1. This lets you set up your automation once your form is submitted. To start, type the name of your automation (1) and then click to Add (2) to add an Integration.

2. Select an Integration and decide the campaign where you want them to be added. Once done, click Save.
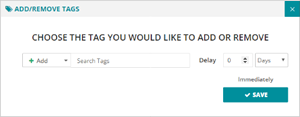
3. Add Actions to tag the user on how they fill up the form. Click Save when you are done.

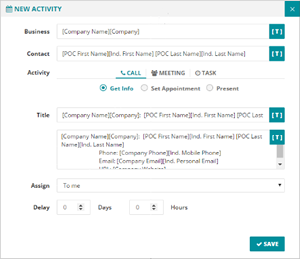
4. Create Activities to follow up with the new lead. Hit Save to apply all the changes you have made. Once you are done in setting up your Automations, click Next.

5. Automation
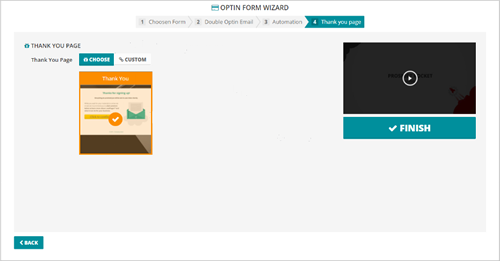
1. There are two options on the Thank You Page. You can either use one of our own Thank You Pages or you can send them to a custom URL where you just need to enter the URL where you want to send them to after they submit their form.
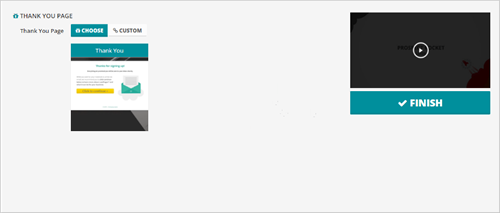
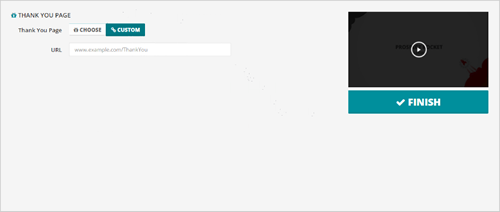
2.Once you have decided what you want to use, click Finish.
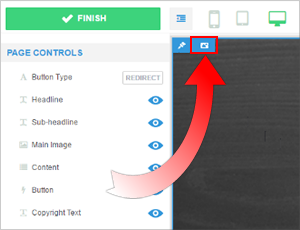
3. This will bring you back to the editor so you can configure your Thank You Page. Like when you are editing your form, use the different Fields Controls to customize your Thank You Page.
🛈 Click the small Eye icon  if you want to disable a field from your page.

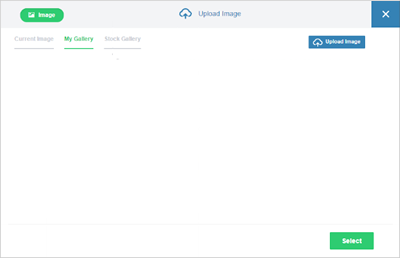
4. Click  and upload your own background image if you want to change your current image background.
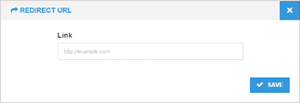
5. By default, we have a button to send them to a website. If you want to change the Redirect URL, you can either click Redirect on the Button Type control or click the Gear  icon on the button. Do not forget to hit Save when you are done.
Once again, click the Save button found on the upper right corner of your page and then click Finish.


6. This will take you back to your Dashboard and this will give you the code which you can add into your page.
