The foundation of the Page Builder lies on these four core elements:
In this article, we are going to walk you through on how you can use these elements and maximize the features of your Funnel Maps.
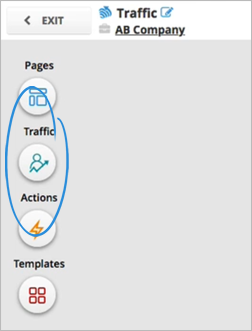
Funnel Builder Elements: Pages
There are several actions that you can do with your pages:
Adding Pages on the Preview Window
To add pages on the preview window, follow these steps:
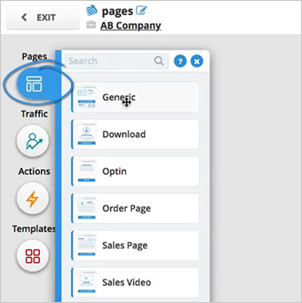
Step 1. Once you click on Pages, you will see all the different pages that you can utilize.
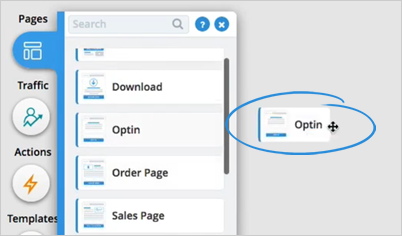
Step 2. To use a page, drag that page over the page builder.
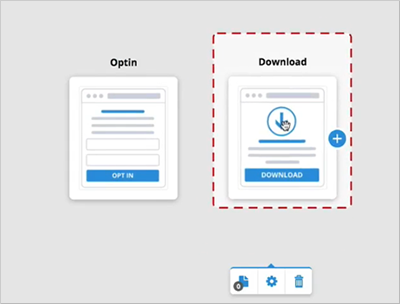
Step 3. You can also add more elements like a Download Page, which will save your time having to create an icon for download.
With the different pages that you can add, you are saving your time on adding different icons.
Adding Features on Your Page
To add features on your page, follow these steps:
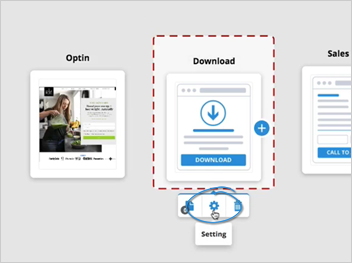
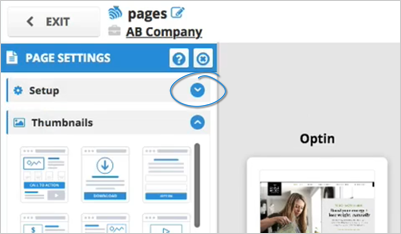
Step 1. Hover your mouse over the page and click the cogwheel icon to see the features of the page that you selected.
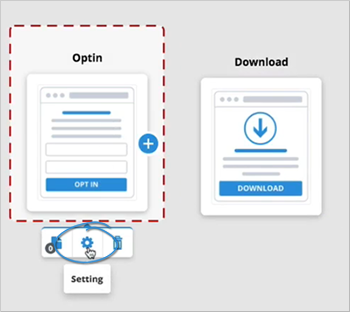
Step 2. You can create the Optin, Page Description, and Page URL from here.
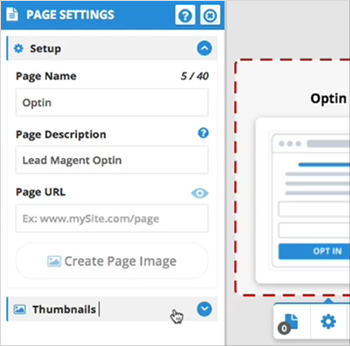
Step 3. You can also change the thumbnail to anything that you want inside this drop-down.
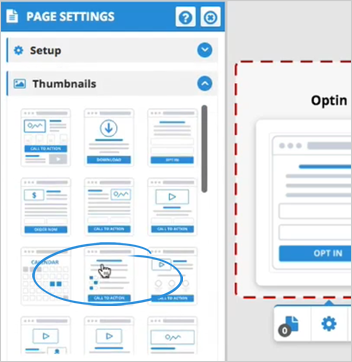
Step 4. Click Custom Thumbnail to add your custom thumbnail.
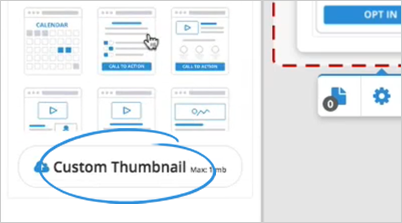
Step 5. Once you have uploaded an image, you can crop the image into your desired size.
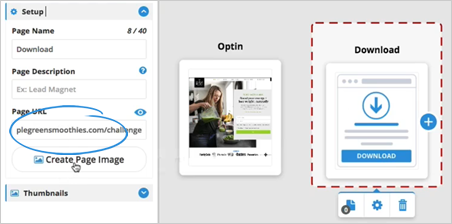
Let’s say, instead of using an image, you want to use the full page of a website. You can start setting that up by clicking the cogwheel icon.
Step 6. Click on the Setup drop-down.
Step 7. Add the URL for that page and click the Create Page Image button.
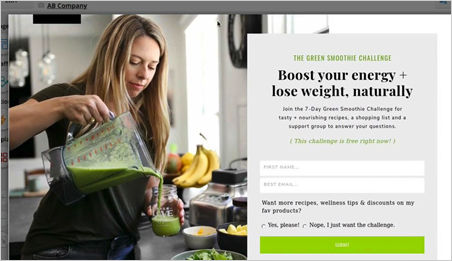
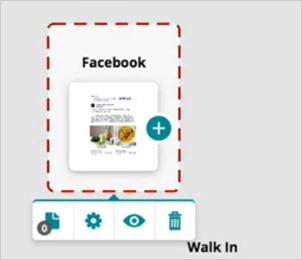
Step 8. Once the page image is created, you can already view that page by clicking the eyeball icon.
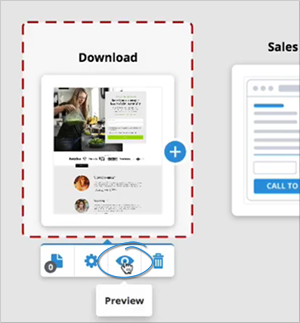
Step 9. Now, you can already view the entire page that you just added. The next thing to do is to tell the complete story of the funnel and demonstrate the steps on each page along the way.
Adding Notes to Your Pages
Here are the steps on how you can add notes to your pages:
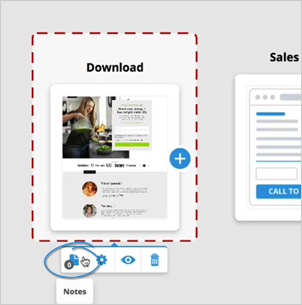
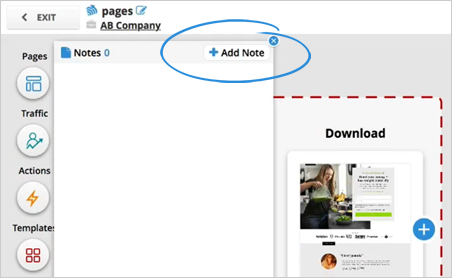
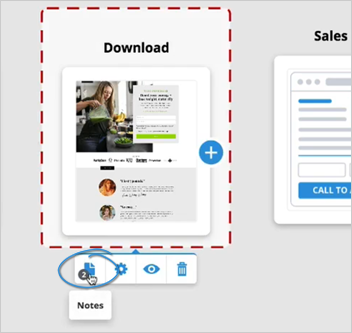
Step 1. To add a note, click the Notes icon.
Step 2. Click the Add Note button.
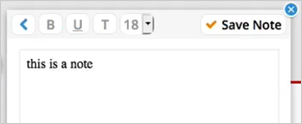
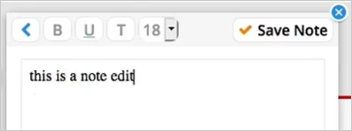
Step 3. Type the content of your note and click Save Note. You can add more notes by repeating step 2.
Step 4. If you want to edit the note, click the Actions icon, and select Edit.
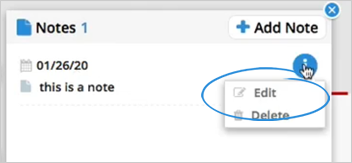
Step 5. Type the changes that you want and click Save Note.
Step 6. You will see that when you hover over your page, it will display the number of notes created on that page.
Changing the Name of Your Page
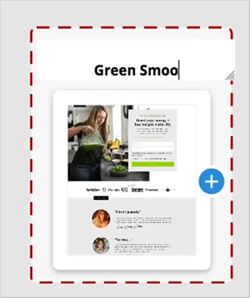
To change the name of a page, double click on the name field, and type the new name that you want to use.
Funnel Builder Elements: Traffic
To start setting up the traffic inside of your business maps, follow steps:
Step 1. Click Traffic to see all the different traffic options that you can use inside of your Business Maps, creating your funnel.
Step 2. Drag a traffic icon to the page builder.
It does not matter what type of traffic you are looking at. Every business out there has a funnel; it is just a matter of where the traffic is coming from and how people are opting for that.
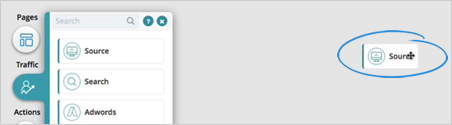
Step 3. You can leave these icons the way they are, or you can add an image to make it more effective. To do this, click on a traffic element and click on the cogwheel icon.
--Ws.png)
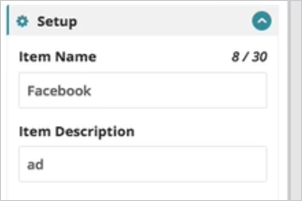
Step 4. Type the Item Name and Description.
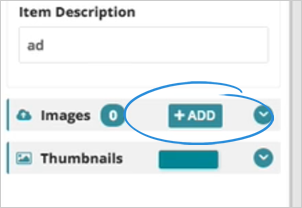
Step 5. Click the Add button to add a thumbnail.
Step 6. Crop the image ad and click Save.
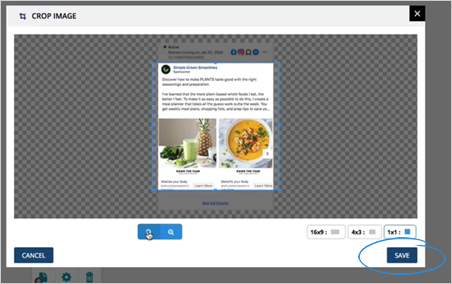
Now you already have the thumbnail of the Facebook ad.
Step 7. To view the complete ad, click the eye icon.
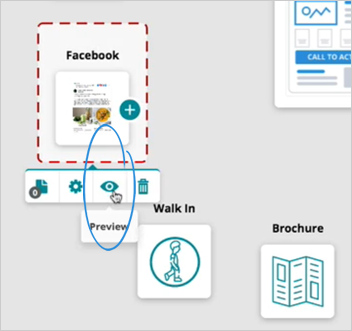
No matter where you are bringing your traffic into your funnel, we will cover you with the icons inside of Traffic.
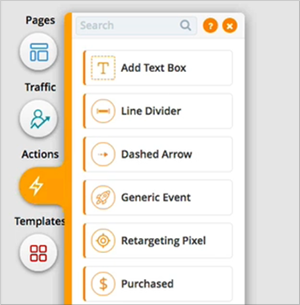
Funnel Builder Elements: Actions
There are different actions that can be taken inside a funnel. It is a long list of actions because that is the thing that drives people through. Remember that they have to push the button and click to get to the next step.
There are a ton of actions that we need to look at, and just about any actions you can think of; we have covered it under Actions.
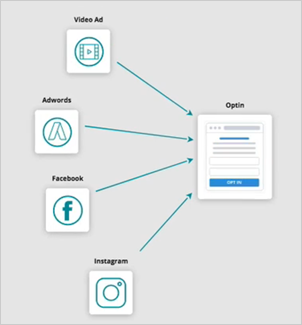
In this example, you can see that before they can see the Optin Page, they have to see the ad and click the link.
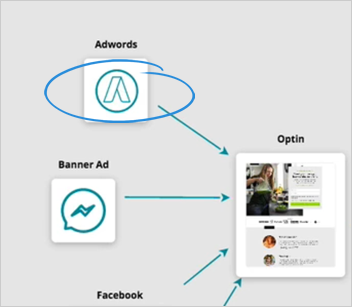
To add that particular action, go over to actions and add Click Link. The easiest way to do that is by typing that action’s keyword, which, in this example, is "cl".
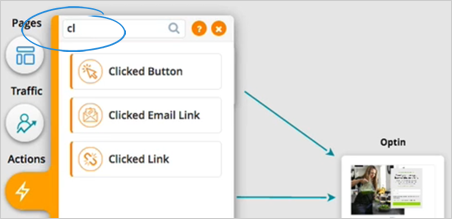
Once you have done that step, you can now drag the Clink Link action over the template.
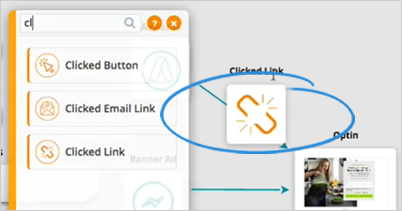
You will also notice that they currently see the Optin Page. Before they can opt-in, they have to fill up their information and click the button to be opted in.

Every step in the way, there is an action that covers the whole gamut. From walking in the store to leaving a five-star review, every action that you can imagine, we have already identified for you to utilize in building up a solid business map.
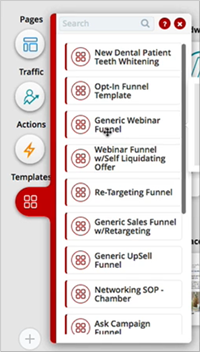
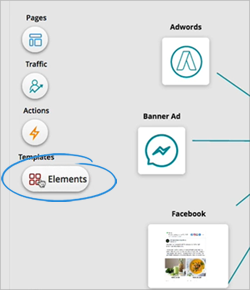
Funnel Builder Elements: Templates
Now that you have your Funnel Map put together, you will notice that there is a button that says Templates and inside of it, you will see Elements.
Template Elements will be an easy place for you to pull these template elements if you are going to be utilizing multiple times in different funnels.
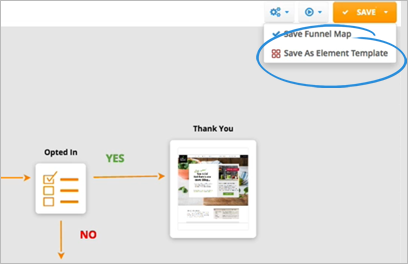
Saving and Using Your Saved Element Template
To save an existing template, follow these steps:
Step 1. Cick the Save button and select Save As Element Template.
When you save it as a regular template, it will be used outside of your account. This template is exclusively for your use only and will not be shared outside of your account.
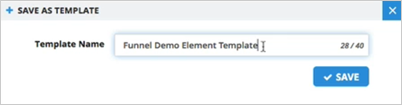
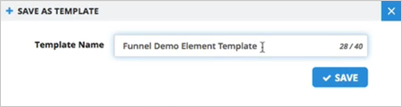
Step 2. Type the name of your template and click Save.
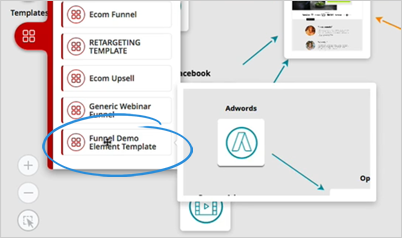
Step 3. To see the template that you just saved, click Elements.
Step 4. At the bottom of the list, you will find the template that you saved. You can already use the template by dragging it over the page builder.
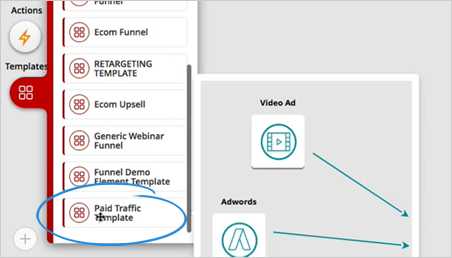
Step 5. In this example, we are going to save a template that consists of different traffic sources. When creating the same starting point to another new funnel map, instead of dragging each same element, you can save that template as well.

Step 6. Let’s say we save this template as “Paid Traffic Template”.
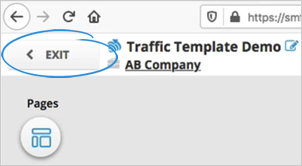
Step 7. Click Exit.
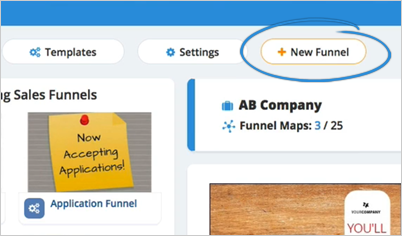
Step 8. Click the New Funnel button.
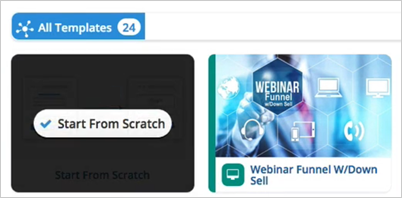
Step 9. Click Start from Scratch.
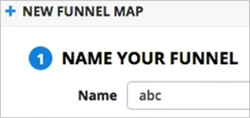
Step 10. Type the name of your funnel.
Step 11. Select a funnel type and click Next Step.

Step 12. Drag the Paid Traffic Template over the page builder.
Step 13. Now, instead of having to drag those elements each over, you can go to Templates and have a starting point so you can save time as you build out the rest of your funnel.
Related Articles:
Creating a Funnel From Scratch
Creating a Funnel with Admin Templates