There are three different ways to build up a Funnel Map:
1. Creating from scratch.
2. Creating from an admin template.
3. Creating from one of the templates you have previously saved for your agency’s use.
In this article, we will walk you through step by step how to create a Funnel Map from scratch.
Accessing your Funnel Map Page Builder
Here are the steps on how you can access your Funnel Map Page Builder:
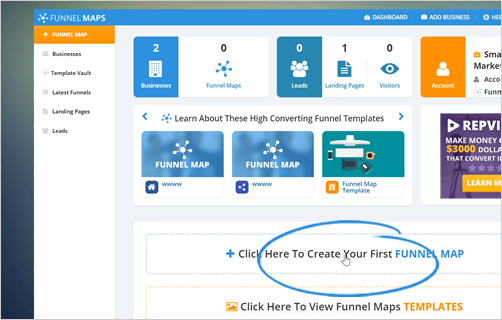
Step 1. From the main dashboard, click Click Here To Create Your First Funnel Map.
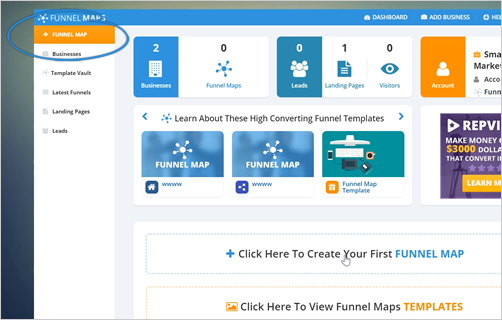
Step 2. You can also click the + Funnel Map button found on the upper left-hand corner of the main dashboard.
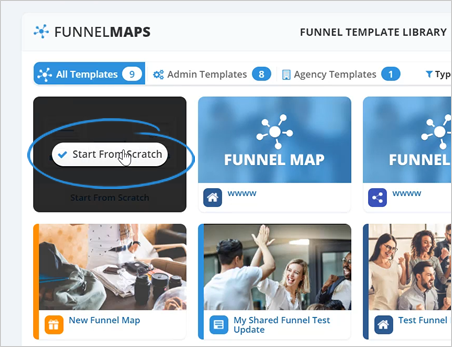
Step 3. Once you click the buttons that are mentioned above, it will take you to the Funnel Maps library. You can select a template or choose to start from scratch.
To create a Funnel Map from scratch, click on the template where it says Start From Scratch.
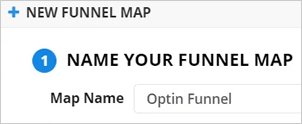
Step 4. Type in the Map Name.
Step 5. Select the Map Type.
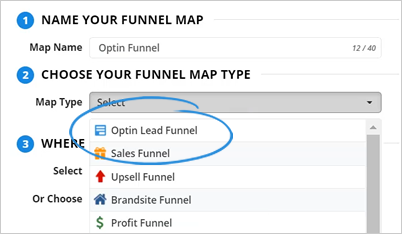
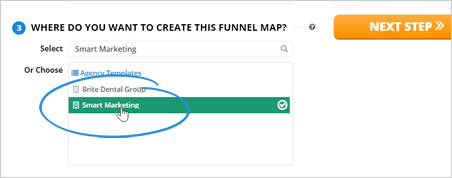
Step 6. Choose the business you are creating this Funnel Map for.
Step 7. After filling out these required fields, click Next Step.
Step 8. Start building your Funnel Maps using the different elements found on the left-hand side of the Page Builder.
There are four elements that you can choose from:
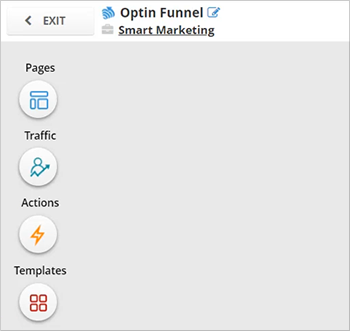
If you want a more detailed article about the page builder elements, read this article.
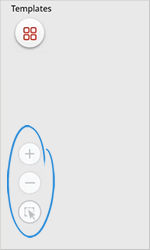
Step 9. On the lower left-hand side of the builder, you will find three tools that will help you easily create cool Funnel Maps:
Creating a Funnel Map from Scratch
If you want to create a Funnel Map from scratch, follow these steps:
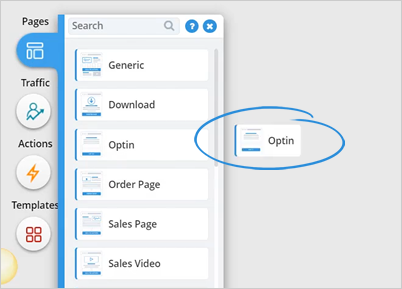
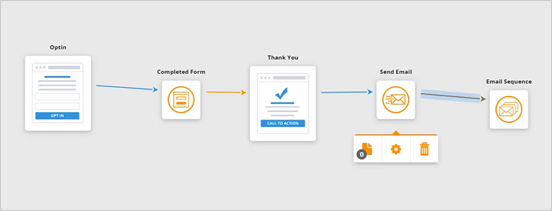
Step 1. Let’s start with an Optin Page. From the Pages element, look for the Optin Page and drag it over the builder.
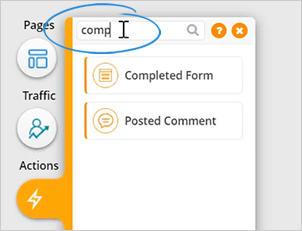
Step 2. Since our desired outcome is to have our leads fill out a Capture Form.
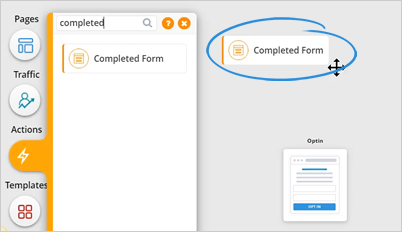
From the Actions elements, type in “completed” using the Search Bar.
Step 3. Drag the element over the builder.
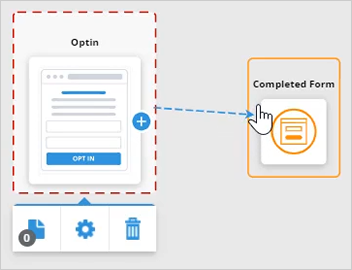
Step 4. Connect these two elements with an arrow. To do that, click on the first element.
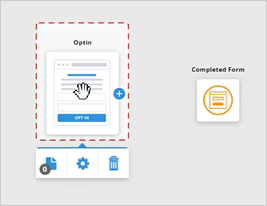
Step 5. Look for the plus icon.
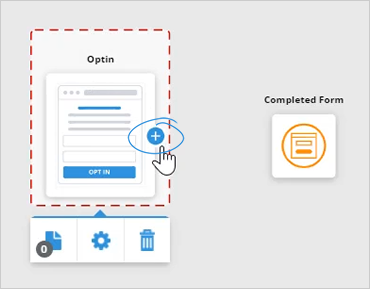
Step 6. Connect it to the Completed Form element.
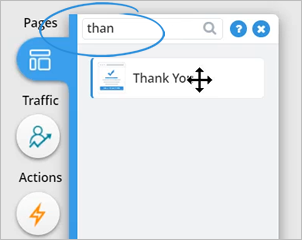
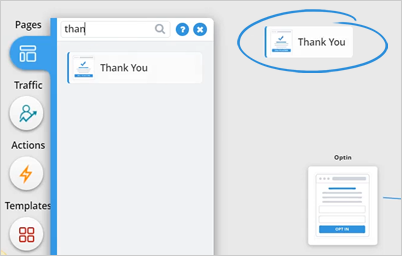
Step 7. Now you can already start adding additional to your funnel like a Thank You Page. Go back to Pages and type in the word “thank you”.
Step 8. Drag the element onto the builder.
When you have multiple elements already on the builder, you can adjust the alignment later on. The most important step is completing your funnel first.
Step 9. Once the Thank You page is on the builder, you can now send them an email confirmation to let them know that they have successfully opted in.
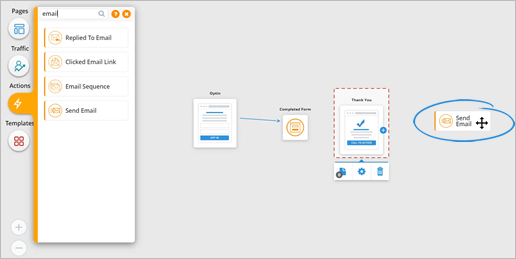
Step 10. Now keep that engagement going through an automated follow-up sequence.
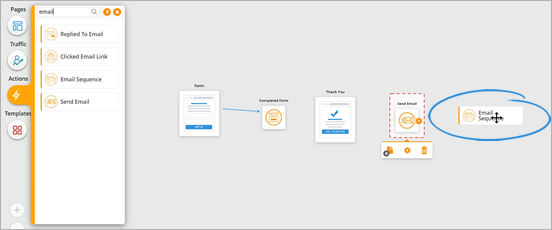
Step 11. Connect the elements using arrows.
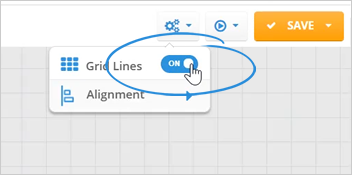
Step 12. There is also another tool that you can use, which is your Grid Lines.
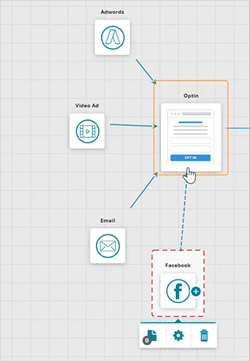
Step 13. You can also specify your traffic sources or how you are driving traffic to your opt-in page. Specifying your traffic sources is where the Traffic elements come in handy.
Click Traffic and select your traffic sources.
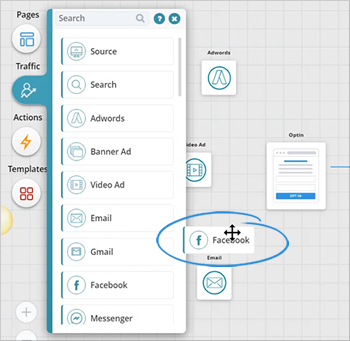
Step 14. Once you have added the different traffic sources, connect them to your Optin Page to show the relations between these elements.
Step 15. Once you are done, click Save.
Related Articles:
Funnel Builder Elements
Creating a Funnel with Admin Templates