The Broadcast section allows you to send Voice and Email Broadcasts out to a select segment of the contacts in your system. In this article, we will walk you through all the different parts of the Broadcast Dashboard.
To access the Broadcast Dashboard, go to ‘Marketing’ > ‘Broadcast’.
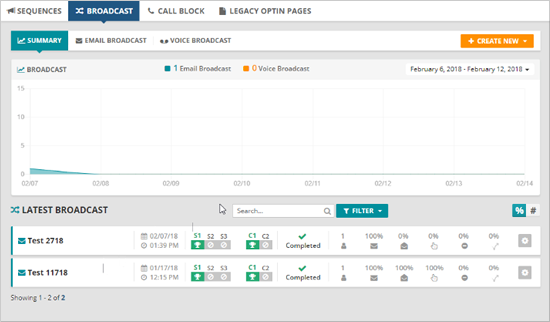
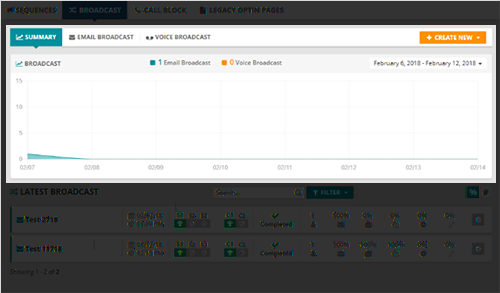
Summary Tab
The Summary tab displays both your Email Broadcast and Voice Broadcast which lets you see how your broadcast is performing over the last 7, 30, 60, and 90 days or custom range to view your data inside the graph.
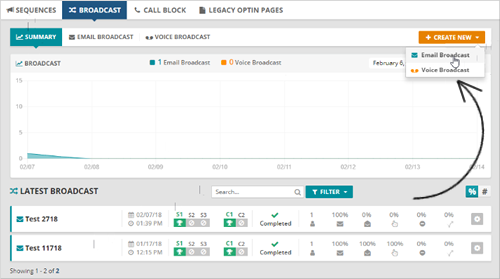
🛈 If you want to create a broadcast, click the ‘Create New’ drop-down and choose the broadcast that you want to create. Alternatively, go to the Email Broadcast tab or Voice Broadcast tab and then click ‘Create New’ to start creating the broadcast of your choice.
Latest Broadcast
The Latest Broadcast section displays both Email and Voice Broadcast that you have sent out. In this section, it displays all the details on each of your Broadcasts. These includes:
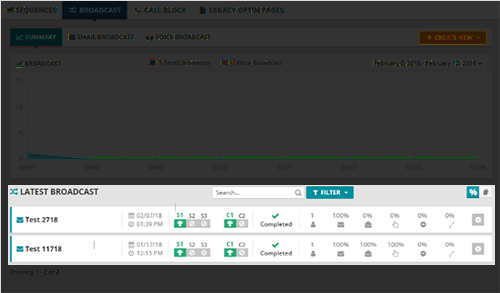
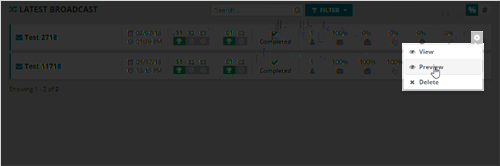
🛈 If you want to see a more detailed information about the broadcast, click the Gear icon ( ) and select the action that you want to perform.
Here are the different actions that you can select: