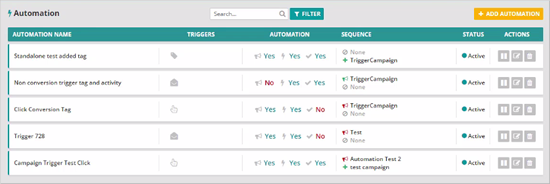
Under Marketing, click Automations to see your new Automations Dashboard. From this dashboard, you are going to see all the automations that are currently created inside of your system. This has automations that are Stand Alone and the automations that are tied to your campaigns.

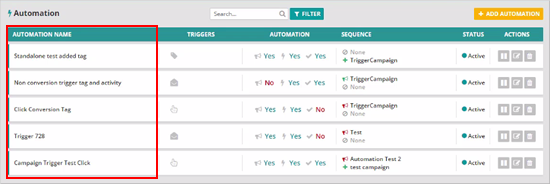
2.1. Automation Name
This is the name of the automations that you have created.
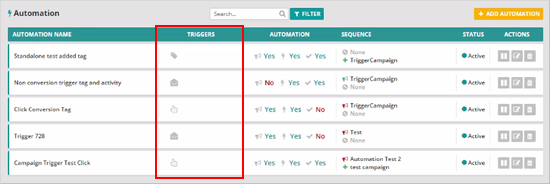
2.2. Triggers
Triggers are what is actually triggering the automation to happen. Here, you will see several icons on what is actually triggering that automation.
Trigger icons:
 ) if this triggered the automation.
 ) if this triggered the automation.
 ) if this triggered the automation.
2.3. Automation
In here, you will see what is actually happening once that trigger is fired. Again, you will see several icons here.
Automation icons:
 ).
).
 ).
).
 ).
).

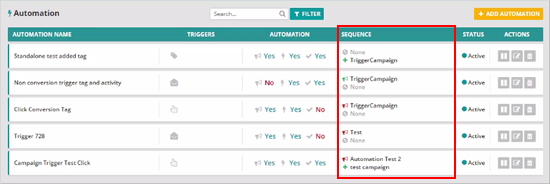
2.4. Sequence
The Sequence area lets you see a broad overview of what is happening inside your automations. You can see what campaigns are removing them from and what is adding them to.
Under the Sequence, if the top line if it is a green megaphone ( ) that means that after the automation happens, the contact continue to stay inside of that campaign. Beside it is the name of the campaign (
 ) that the trigger is attached to. If the megaphone is red (
 ), that means that it is a conversion trigger and when that automations fires, it is going to remove the contact from the campaign which the name is beside the icon (
 ).
).
On the bottom line, where it says “None” ( ), that means that it is not adding the contact to any campaign.
2.5. Status
The Status section shows if the automation is Active or Inactive. At any time, you can hit pause to make the automation inactive.
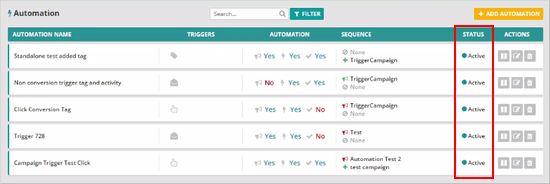
2.6. Actions
Under Actions, you have several options:
 ) if you want to pause a campaign. This will change the campaign’s status to Inactive (
 ).
).
 ) if you want to activate an inactive campaign again.
 ) to edit an automation.
 ) to remove an automation from your list.

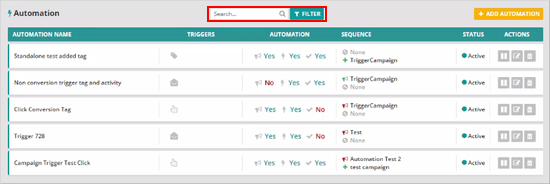
2.7. Filter
Use a filter to quickly sort your automation. If you want to filter by Automation Name or if you want to see all Inactive campaigns only, then you can apply filters to show only those automations.
2.8. Add Automation
Click the Add Automation button if you want to create a new automation from scratch and add it to your current campaigns.
